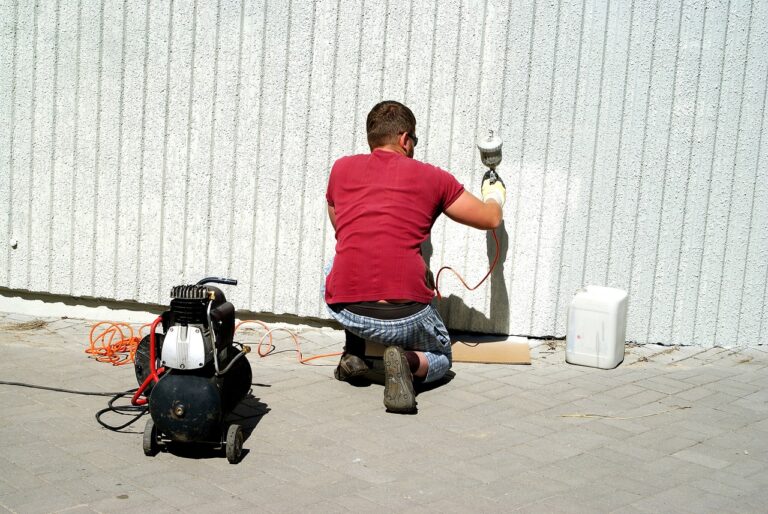
Sanding Walls before Painting
You can use either a sanding block or some sandpaper will help smoothen those uneven surfaces (particularly those with high-gloss and gloss paint), followed by simple wiping and drying. 
So, below I’ll discuss the sanding techniques and tips (step by step) that you can follow to effectively smooth those drywall surfaces. You can also use sandpaper (fine-grit) on the baseboard and ceiling.
Materials and Tools required
- Sanding pole
- Joint compound
- Sanding sponge
- Putty knife
- 150-grit sandpaper
- Sanding block
- Trouble light
Step 1: Work with the Sanding tool
Just like with other remodeling projects, come with the correct tools to achieve that quality job. So, as noted above, in sanding your drywall – get a sanding paper (150-grit) and hand sander.
Besides, get your dust mask (the double-strap type) to protect yourself from dust plus use painting glasses to safeguard your eyes. Use a scarf or hat to keep dust off the hair.
For the sanding project, the pole sanders will be very effective. Some of them will be challenging to learn but for sanding 2+ rooms, the pole sander will reduce the effort required.
But the pole sander (the drywall type) may flip over and thus gouge your surfaces increasing the needed repair work – and thus you must be very careful.
- NB: It’ll be helpful to keep your sander head in a small angled position – but don’t allow it to achieve the right angle.
- It’ll be very effective for drywall primer prior to painting with reduced pressure and control.
To use the drywall sander, use very light pressure on the wall’s seam edges (to remove bumps and ridges ) plus around the screws to prevent “fuzzing” on your drywall paper.
Further, you must control any dust to prevent it from drifting all over the space and create some white film on different surfaces – this could eventually be challenging to remove.
Maybe you’ve been advised to use a damp sponge for smoothing various joints and not sandpaper – to reduce dust – but this might not give you a quality finish.
Also, use protective gear against dust as opposed to using costly dust-catching devices. The Sandpaper to use should be 120 – 150 grit (starting) and 180 – 220 for finishing.
See Also: Deck Sealer for Wood
Step 2: Get a Fine-Grit sandpaper
If you have a rough surface before painting, you might think that 80-grit sandpaper would be fast and result in a better surface. This is because joint compounds are soft and lightweight.
Therefore, using anding screens or coarse-grit paper will result in unlovable sanding marks. So, use 120 – 150 grit sandpaper to achieve great outcomes – with great fitting.
Get the 120 – 150 grit sandpaper onto your sander – ensure its taut by anchoring it under some clamp.
Step 3: Don’t Sand Gouges, Fill Them
Caution, avoid sanding the large ridges and gouges – just trowel an additional joint compound coating on such surfaces as opposed to sand-gouging them.
I recommend the same process for the edge of the joints, as excessive sanding could damage the drywall’s paper face. Easily and simply trowel some coating (thin) over the seam edges.
Next, you’ll just use an additional joint compound to fill up the grooves – the large ridges and grooves – and hence you won’t require to sand the surfaces.
See Also: Deck Stain for Wood
Step 4: Touch up Problematic spots
Check the spots that are bad using some hand-held light after doing the final finishing with the hand sander, and ensure to cover the whole surface using the joint compound.
Use your pencil to mark the bad spots that’ll require detailed sanding or filling. Now, use the handheld lamp and shine it parallel to your wall surface to check bad spots.
Get your sponge sander and hand sander to easily touch-up the problematic spots. Mark such spots and depressions that we’ll fill – fill them with a joint compound and sand the spots once dry.
To mark the problematic spots on the ceiling and walls, after shining some light parallel to such surfaces. So circle the pits and dings – problematic spots – using your pencil.
Finally, get back to the marked problematic spots and touch them up with some joint compound – and finally re-sand such areas for a smoother surface ready for painting.
Step 5: Wall Priming and Sanding
Wall sanding following the priming process is a critical aspect you must not skip. Sanding prior to painting will help remove lumps and paper fuzz that would otherwise show through the paint job.
Therefore, this step allows one to do away with the imperfections by filling them using your joint compound. Finally, remember to sand plus reprime the touched-up spots.
See Also: Swing Set Stains
Step 6: Sand the Corners Using a Sanding sponge
For the corners, use some sanding sponge – don’t use a hand sander as it might lead to damage to the corners. You’ll not achieve that crisp corner while also causing unwanted gouge scuff.
But you can sand around a few inches on your corners using the hand sander. Finally, get your sanding paper or a sanding sponge to touch up your surfaces.
So, to sand your corners using just a sponge as opposed to using the large-sized hand sanders since this could end up gouging your corners.
Step 7: Final Light-Sanding
The last step will involve some light-sanding of your surfaces using some light pressure – but don’t sand the same spots using the straight-line technique.
Such a process may leave unnecessary depression or groove – which will effectively show after you’ve painted. Avoid sanding on various openings and electrical boxes.
Conclusion
Therefore, you’ll learn to prevent regular sanding mistakes while also getting the right outcomes on the drywall sanding project. This will clearly be a dusty and tedious job.