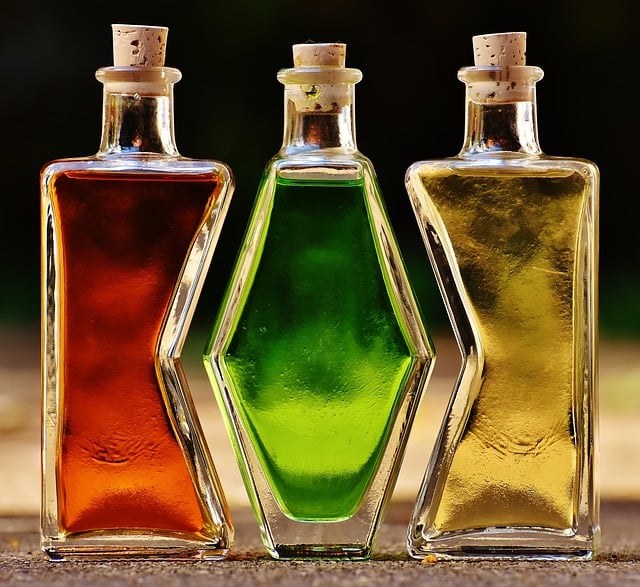
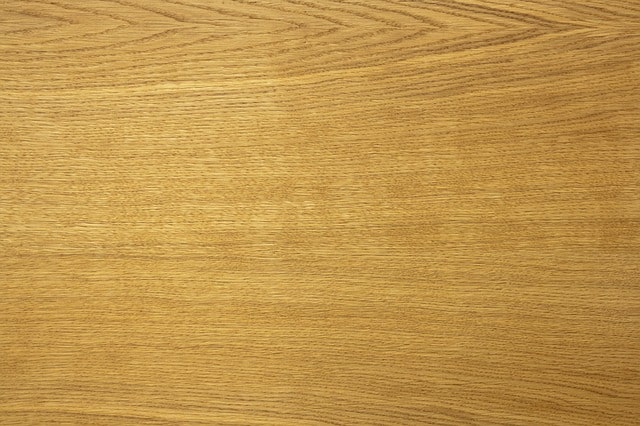
Can You Use Acrylic Paint On Wood?
Acrylic paint is a commonly used solvent in surface painting or paint restoration process. Its high stickiness action and unmatched durability have always made it stand out as compared to latex paint. 
However, acrylic painted surfaces tend to be cumbersome during the paint removal process. Perhaps you are wondering which surfaces you can coat with acrylic paint.
So, can you use acrylic paint on wood? The direct answer is YES. Acrylic paint sticks on the wood primary material impressively without forming drains or runs if the right procedure is followed. Usually, you’ll need to select the right items, prepare the wood surface appropriately, and prime the wood to improve the surface stickiness.
Further, prepare acrylic paint as per the manufacturer’s instructions, carry our actual painting stepwise, and seal the painted wood surface before terminating the coat with a professional finish tint. Importantly, you need to consider precautions and safety measures given when painting with acrylic paint to avoid contamination and health hazards.
See Also: Staining Pressure Treated Wood
Details: Can You Use Acrylic Paint On Wood
a. Select Items Required
- Paint tray and paintbrush/roller
- Acrylic paint and acrylic primer
- Paint sealer and wood sander
- Sandpaper and scrapper
- Polyethylene bag and bucket
- Waterpoint and soapy detergent
- Vacuum cleaner and paint sprayer
- Protective gear – gloves, goggles, overalls, boots, and respirator
b. Prepare the Wood Surface
Surface preparation is carried out to remove the roughness/debris and enhance surface stickiness action during paint application.
- Wear protective gear (goggles, overall, boots, respirator, and gloves) for personal safety
- Connect the sander to the power source and switch it on. Gently, polish the surface to remove debris and dust particles
- Further, sand the damaged section or edges with medium-grit sandpaper to attain unmatched smoothness.
- Using a blower, blow intricate dust particles over the polished wood – the particles impend paint stickiness
Finally, rinse the wooden surface with a wet piece of cloth and leave it to dry completely
See Also: Deck Sealer for Pressure Treated Wood
c. Select Primer and Prime the Wood
During primer selection, you need to consider a primer that is compatible with a particular type of acrylic paint (oil-based acrylic paint should be primed using an oil-based primer). Wrong primer selection affects the overall paint coat strength, which may lead to peeling or chipping with time.
Besides, prepare the primer as per the manufacturer’s instructions – a well-prepared primer should load on the paintbrush without dripping excessively. Then, apply the primer over the wood surface (back and forth) until the surface is entirely covered.
Leave the surface to try for an hour or otherwise advised by the manufacturer. You can opt to seal the primer where necessary.
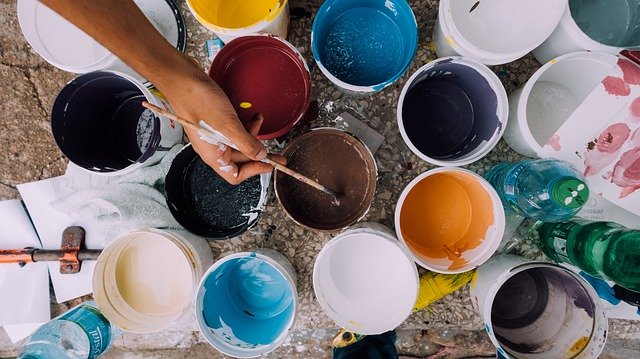
d. Prepare Acrylic Paint
Use the instruction given by the manufacturer to prepare your acrylic paint. Alternatively, follow the procedure highlighted below:
- Check on the expiry date of acrylic paint – dispose or return expired paint
- Fetch little paint in a paint tray and thin slightly
- Mix using a paintbrush until the solvent attain sufficient dilution
- Add more paint and thin further until you get the right quantity suitable for the surface area to be painted
Carry out the drop test experiment over the wood surface to ascertain the quality of stickiness before actual painting is done
See Also: Deck Stain for Pressure Treated Wood
e. Actual Paint Application
- Load the paintbrush sufficiently and apply back and forth over the wood surface
- Repeat the process over the other unpainted area. Don’t over press the paintbrush when painting to prevent the formation of streaks
- Cut wood corners using an angled paintbrush, while flat surface should be painted with a wide blisters paintbrush for effective paint coverage
- Eliminate the runs (while still wet) by gently passing a wet paintbrush without over pressing
- The finish paint coat should be uniform and free from runs.
Flatwood surfaces are best painted using a roller. The roller should load paint sufficiently for smooth paint application (without drains), while the applied force should be done gently done and smoothly to avoid streak formation.
Vertical wood surfaces should be painted using a paint sprayer to reduces vertical drains and attain a firm paint stickiness level. Leave the paint to dry over the time prescribed by the manufacturer.
See Also: Pressure Washer for Paint Removal
f. Seal the Wood Surface
Sealing the painted wood is a crucial step that improves service life and eliminates surface contaminants that lead to aging and paint fading action.
You can seal acrylic painted wood with a clear vinyl coat to attain a finished aesthetic impression eventually.
Most acrylic gloss or satin paints contain sealant (you need to confirm on the labels) and therefore, you don’t need to seal upon paint application.
Sealed wood finish paint coat is tough, durable, and more resistant to external harsh weather conditions as compared to unsealed one.
g. Professional Finish
Upon sealing, the finish coat should be left to cure within the manufacturer’s given time.
Wood surfaces found in a dusty environment ought to be sprinkled with cold water (a few minutes after painting) to prevent dirt layer formation upon contact – the paint has electrostatic charges, which attract dust if not pretreated.
Alternatively, you can cover the painted wood surface with a polyethylene bag. See Also: Sander for Wood Trim.
What are the Major Challenges of Acrylic Painted Wood Surface?
Acrylic painted wood surfaces face various problems, especially if instructions and procedures given are not followed entirely.
1. Chipping
Chipping is a condition where the paint layer tends to bubble and fall off the surface with time.
This condition is highly pronounced in wet/humid areas due to moisture integration within the paint coat layer.
Chipping may result if you coat your wood surface when it’s still wet – the water content forms bubbles within the paint layer and ends up chipping after busting.
Moreover, the painted wood surface may be subjected to moisture for a long period (especially the unsealed wood) which leads paint layer weakening and hence resulting to paint chipping.
When chipping occurs, it’s advisable to restore the entire wood surface to achieve a firm substituent coat finish.
See Also: Gold Paint for Wood
2. Peeling
Peeling is a condition where the paint coat layer detaches from the wall surface partly or completely. Peeling action is caused by insufficient contact stickiness and low paint quality.
The ability of acrylic paint to stick firmly on the surface material is a function of the quality of wood, surface preparation, and paint dilution level – insufficiently prepared wood surface leads to peeling with time.
Moreover, non-primed wood surfaces are highly susceptible to peeling than primed wood. Indeed, the primed coat layer prevents moisture penetration and inhibits both peeling and stuffing action.
Another cause of peeling is the application of multiple paint layers over old paints or dried unsealed paint – the contact stickiness is weakened upon every paint layer and thus ends up leading to peeling action eventually.
Usually, paint tends to peel from the edges if the wrong coat termination was carried out. Inclusions and scratches also initiate peeling action too.
3. Fading
Fading is an act that leads to the original paint layer losing its initial impressiveness with time due to color deterioration.
Acrylic painted wood fades when exposed to harsh climatic conditions like direct sun insolation or cosmic radiation.
Low-quality acrylic paint fades easily, especially if it’s not UV-rays protected. Your paint layer tends to lose the sparkle and dense color as it’s exposed to external conditions.
Fading is more pronounced in dry/arid areas than in a wet and cool environment. Indoors wood surfaces (acrylic painted) stay longer without fading than external wood structures.
See Also: Pump Sprayers for Staining Fences
Safety Measures and Precautions to Consider When Painting Wood with Acrylics
During acrylic paint application, follow the safety measures and precautions highlighted for your own safety and hazard prevention.
- Always wear protective gear (gloves, goggles, overalls, boots, and respirator) when painting wood with acrylic paints – the solvent stain your cloth when it gets into contact.
- Always prep wood surface to improve stickiness level before the actual acrylic paint application is carried out.
- Prime wood surface to boost adhesive contact and eliminated peeling/scuffing from occurring.
- Before paint or prime preparation begins, read, and follow the manufacturer’s direction on the label strictly.
- Never used expired acrylic paint for wood painting – it may affect the wood primary material or lead to low stickiness action.
- Upon paint/primer preparation, carry out a drop test experiment to ascertain the effectiveness of the solvent over a particular wood surface.
- Never touch acrylic paint or thinner directly with your hands – the solvent may contain stains or components that may irritate your skin.
- Seal finish paint with vinyl to improve coat strength and eliminate the occurrence of peeling, scuffing, or fading with time.
- Drains formed during paint application should be corrected while still wet using a paintbrush.
Cover the floor with a polyethylene bag when painting to avoid staining the surface.
See Also: Cordless Paint Sprayers
Conclusion
Your worries on whether you can use acrylic paint on the wood are now clear and you can effectively undertake your DIY projects without any problem.
The high stickiness action and external resistant properties make acrylic paint more preferred than latex paint.
Usually, you’ll need to select the right items, prepare the wood surface appropriately, and prime the wood to improve the surface stickiness.
Further, prepare acrylic paint as per the manufacturer’s instructions, carry our actual painting stepwise, and seal the painted wood surface before terminating the coat with a professional finish tint.