How to Thin Enamel Paint
If you are a paint enthusiast, then you must have used enamel paint in one way or another. The hard gloss finish is one mark of the quality thinning process in enamel paints.
But most paint users face challenges when thinning (one may over dilute or even thin insufficiently). Improper thinning affects the overall finish quality and may subject the surface to peeling, chipping, or scuffing with time. 
In this regard, we shall be discussing how to thin enamel paint. First, you’ll need to have the right thinning items, check on the prevailing weather conditions, choose an ideal thinning location, and select the correct paint thinner.
Besides, you will require to measure the right amount of thinner about the quantity of enamel paint, then stir the mixture appropriately before testing the thinned paint to ascertain the coat quality. Remember, enamel paints are manufactured in different varieties. Therefore, not all thinners work for any enamel paint (you need to be cautious when selecting thinner to use on a particular enamel paint).
Importantly, you should always wear protective gear (gloves, respirator, facemask, and overall) when thinning since enamel paint may release toxic fumes harmful to human health. To gain an in-depth understanding, let us get into the details.
Details: How to Thin Enamel Paint ( Step-By-Step)
STEP 1: Select Best/Ideal Location
Items Required
- Paint stirrer and safety goggles, overalls, and gloves
- Respirator and Paint Thinner
- Empty Bucket and Thinning surface
- Paint sprayer, paintbrush, or roller
- Piece of Cloth
Select an ideal environment that is well-ventilated since enamel fumes cause breathing difficulties. Moreover, thinner add a toxic smell that irritates the nasal cavity or respiratory system when inhaled.
It’s advisable to open windows and doors when thinning paint in a room or opt-out paint thinning in an open field.
The odor from thinner and enamel paint may cause dizziness, headache, or nausea when inhaled in excess.
See Also: Thinning Semi-Gloss Paint
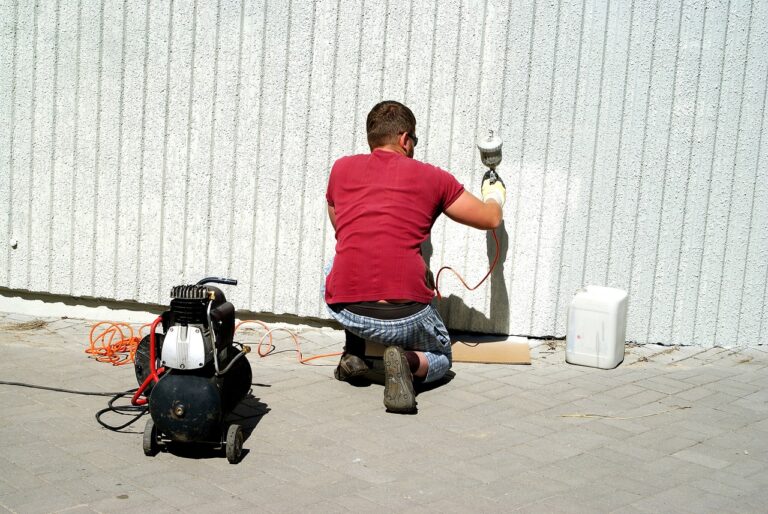
STEP 2: Wear Protective Gear
Weather Considerations
- Prevailing weather condition determines the amount of thinner that is to be used during the application process. Humid and warm temperatures require more thinning (thinner), while less humid and cooler weather needs less thinning (thinner).
Therefore, it is advisable to prepare your enamel paint during cooler and less humid weather conditions with the same amount of thinner used.
Human safety and health are paramount during the thinning process. Ensure you put on protective gear (facemask, respirator, gloves, eye goggles, boots, dustcoat) before starting the paint thinning procedure.
Avoid direct contact with thinner or paint as it cause skin burn or irritation – check the paint consistency using a sprayer.
STEP 3: Select Appropriate Thinner
Select thinner according to the type of enamel paint you are using. Also, the paint application method determines the thinner to be used, i.e., paint spray requires a thinner that won’t stain the gun or cause removal challenges.
Thinner meant for water-based enamel paint are not appropriate for oil-based enamel paint and vice versa – with various thinning guidelines. NB: Never thin oil-based enamel paint with water.
STEP 4: Prep the Paint – Where necessary
Prep paint appropriately (where necessary) to improve the thinning action.
You need to read instructions or labels on the paint fast since not all enamel paint requires prepping.
STEP 5: Measure Right Amount of Thinner
Put a substantial amount of paint in the bucket, then add a small quantity of thinner and stir. Add more thinner and stir until the mixture is sufficiently thinned.
Usually, you are expected to maintain paint to the thinner ratio of 3:1 or 4:1. This can be achieved by actual measuring of enamel paint and thinner before mixing even for weathered wood.
However, this is not the usual case when thinning. People tend to mix the solvent directly without weighing paint since it’s a tedious process or wastes time.
In such a case, you will only need to ensure that the enamel paint is always more than thinner as you continue stirring – consider the paint’s viscosity.
STEP 6: Mix the Solvents
Mix enamel paint and thinner according to manufacturer’s instructions. The actual type of thinner may not be indicated on the enamel paint label.
However, you can be instructed or advised on the particular base compound to consider.
The mixture should be stirred thoroughly to attaint uniform solve that is less viscous and more comfortable to apply with a paintbrush or a roller.
Thinning process for paint HVLP sprayer should be thinned further to prevent blockage of the spray gun.
STEP 6: Testing the Thinned paint/Mixture
Carry out a drop test experiment on the surface to be painted. To do this, you will need to paint a small surface using any method (spray paint, paintbrush, or roller).
Leave the surface for a few minutes and ascertain whether that concentration would achieve the best finish quality.
Never carry out actual painting without the certainty of the drop test result – you may attain a low-quality surface finish.
Why Should we Thin Enamel Paint?
1. To Ease Application Process
Enamel paint is packed in a thick viscous state that is difficult to apply with a paintbrush, roller, or spray gun.
Thinning is needed to break the bond further to ease spreading – paint without much hassle.
Usually, the unthinned enamel paint sticks on the paintbrush or clog the paint sprayer, making paint application difficult.
2. To Improve Stickiness Quality
Unthinned enamel paint has low stickiness properties – excellent for deck sealing.
The thinning process breaks and elongates paint intermolecular bonds (increase surface area on contact), improving overall sticking on given primary surface material.
The active ingredients are activated during the thinning process, hence exposing them to direct contact with the surface to be painted.
3. To Reduce Paint Wastage
Unthinned paint requires large quantities to coat a particular surface than thinned enamel paint.
Thinning increases the overall paint quantities and reduce application challenges when painting – flow strain.
See Also: How to Thin Oil Based Paint
4. To Eliminate Peeling
One cause of peeling is having inappropriate thinning preparation or direct application of unthinned enamel paint.
Mainly, the paint doesn’t stick on the surface material strongly, leading to peeling shortly after application – prevent your paint from any hardening.
Further, when unthinned paint is applied on a humid surface, chipping or scuffing may occur.
What are the Benefits of Using Enamel Paint?
a. Highly Durable
Enamel paint forms a hard, scratch-resistant coat layer once dried. The gloss appearance gives enamel a competitive advantage over latex paint. Moreover, enamel-coated surfaces are resistant to mold and mildews.
Some manufacturers produce enamel paint with UV resistance properties, thus preventing coated surfaces from UV rays damage.
Though some enamel paint varieties take a longer drying time, the finish left is impressive and more cumbersome to remove (durable).
b. Easier to Apply and clean – wet enamel paint
Thinned enamel paint is more comfortable to apply with either a paintbrush, roller, or paint sprayer.
The paint chemical structure is formulated so that it’s elastic enough and gently held onto the paintbrush during application.
Further, enamel paint can be cleaned easily (while wet) in case of painting error correction.
c. Has Wide Range of Colors
Unlike other types of paints, enamel paint is manufactured in multiple colors for optional selection.
The colors can even be faded to match the aesthetic background you want to achieve.
Moreover, enamel paint can easily be agitated with natural ingredients to boost overall surfaces’ appearance without any stickiness problem.
Which Precaution do You Consider During Enamel Paint Thinning?
1. The thing solvent may be highly flammable – it should be kept away from the fireplace.
2. When thinning, ensure the room is well-ventilated to avoid the accumulation of enamel fumes.
3. Avoid inhaling enamel fumes (wear respirator) – fumes cause nausea, headaches, or dizziness fumes.
4. When enamel paint gets into contact with your skin, wash with plenty of cold water and soap to eliminate the occurrence of irritation.
5. Always wear protective gears when thinning, e.g., facemask, goggles, overalls, boots, and gloves.
6. Carry out a drop test when using thinned paint (before actual application) to ascertain the finish quality – you can test using a paintbrush, roller, or paint sprayer.
7. Always check and follow the manufacturer’s instructions when thinning.
8. If thinned paint remains after painting, it should be store when tightly closed.
9. Consider weather condition before thinning
10. Don’t use two types of thinners to thin one enamel paint – there are many thinning methods
11. Never thin water-based enamel paint with oil-based thinner.
12. Never thin oil-based enamel paint with water.
Which is the Best Enamel Paint Thinning Solvent?
The table below shows the best enamel paint thinners that may be used during your DIY thinning project.
| Type of Thinning Solvent |
Type of Enamel Paint |
| Mineral Spirit/White Spirit | Best for oil-based enamel paint. Delivers excellent finish. |
| Turpentine | Usable on oil-based enamel paint. Though not recommended because turpentine is really aggressive. It accelerates paint’s drying period, which may end up affecting the finish quality.
When used, a little should be mixed with enamel paint. |
| Lacquer Thinner | They are used on oil-based enamel paint. However, it leads to an uneven surface finish layer (unbalanced leveling).
Moreover, Lacquer thinner causes the plastic to melt slightly upon application. |
| Alcohol | For oil-based enamel paint. The result may not be of a high quality due to variation in concentration level. |
| Acetone | Usable on oil-based paint. However, it has complications on enamel painted plastic surface.
Acetone is best used as an enamel paint remover instead of thinning. |
| Water | They are used for water-based enamel paint. It the best to paint thinner. |
Conclusion
The article on how to thin enamel paint is insightful and an eye-opener to various ways of thinning enamel paint.
The accrued benefits associated with the use of enamel paint guarantee you the best quality coat layer. Besides, you enjoy in-depth conviction as to why thinning enamel paint is such a crucial step.
Remember, to achieve the best quality thinned paint, you must locate the ideal environment (like a well-ventilated room ), select the right thinner, and mix the solvents in the correct ratio before carrying out an actual application.