How To Paint Brick (A Step-by-Step Guide)
Perhaps you own a brick home or a wall structure and you intend to improve it’s outlook impression, then, painting is the best option to consider. 
Wrong procedure and painting method cause paint to peel or chip with time upon application.
On how to paint brick; select appropriate tools and materials required, clean the brick surface, strip old paint, sand the surface, repair damaged sections, and polish the surface before rinsing it to dryness.
In addition, you’ll have to select and prepare primer (follow manufacturer’s instructions), apply the primer, select and prepare finish paint, apply finish paint, and undertake quality finish touch before leaving the surface to dry naturally.
Details: How to Paint Brick
Step 1: Surface Cleaning
Notably, wear protective attire during paint application for personal safety and adhere to precautions highlighted in this article.
- Wear protective gear – overall, boots, respirator, goggles, and gloves- for personal safety reasons
- Using a blower, blow off dust and surface debris from bricks gently. Alternatively, you can sweep using a broom or vacuum the surface.
- Fill an empty bucket with water and mop the surface – to remove finite dirt and dust particles
- Leave the surface to dry
To gain in-depth information, let us get into the details. The materials and tools required are;
- Wire Brush and a paint brush
- Sander and gloves
- Primer and empty bucket
- Polishing Machine and overall
- Putty knife and boots
- Power washer/Pressure washer
- Respirator and finish paint
- Paint scraper and filler compound
- Goggles and power source
- Water point and piece of cloth
- Paint thinner and Stripping chemical
- Blower and extension handle
Step 2: Stripping Old Paint
Pour stripping chemical into an empty bucket gently. Add thinner and stir thoroughly until you acquire uniform solution – follow manufacturer’s instructions
- Using a paint brush or a roller, apply stripping chemical over the old paint
- Repeat the previous step until the entire surface is covered
- Leave the stripping chemical to cure for 10 minutes or otherwise advised by the manufacturer
- Then, strip off the cured paint using paint scraper
- Further, scrub the brick with wire brush gently – be careful not to damage primary surface material
- Clean dislodged paint with power wash and leave the surface to dry
Step 3: Sanding the Surface
- Connect the sander to power and press the switch button
- Gently, run the sander back and forth as you clean paint remains and eliminate the rough surface
- Repeat the previous step until the surface is cleaned
Step 4: Repair of Damaged Sections
- Using filler compound, seal damaged sections completely
- Cut excess filler compound and leave it to dry with time stipulated by the manufacturer
- Also, patch the porous section with putty knife in order to attain excellent finish
Step 5: Final Polishing and Cleaning
- Connect the polishing machine to power source and switch on
- Run the machine over the sealed sections gently – be careful not to remove filler
- Repeat the previous step until you attain smooth finish
- Connect power washer to power source
- Clean the brick sufficiently
- Leave the surface to dry naturally
Step 6: Selection and Primer Preparation
When selecting primer, consider factors such as the expiry date, the number of coats to use, the stickiness ability, the waterproof aspect, UV-rays blocker, and the ease during application.
It’s advisable to choose primer that is fast drying and scratch-resistance for brick application use.
- Gently, pour primer into an empty bucket
- Add thinner and stir thoroughly until you get uniform liquid
- Cary out a drop test experiment over the brick surface to ascertain the stickiness ability
Step 7: Primer Application
- Dip a paint brush into primer
- Load the bush sufficiently and cut excess primer to prevent surface drains or runs
- Apply the primer or the surface – back and forth
- Repeat the previous steps until the entire surface is primed
- Leave the primed surface to dry naturally
Step 8: Selection and Finish Paint Preparation
Finish paint selection should always be matched with the type of primer used i.e. oil-based primer should be coated with oil-based finish paint and vice versa.
Further, your finish paint choice is a function on the location of the brick structure – bricks found in wet areas require paint that is waterproof and resistant to mold and mildew.
On the other hand, bricks found in sunny or dry areas should be coated with paint that integrates UV-rays blocker properties.
- Pour finish paint into an empty bucket gently
- Add thinner and stir thoroughly to attain uniform fluid
- Carry out a drop test experiment to assess the paint stickiness lever over the brick surface
Step 9: Finish Paint Application
- Dip a roller or a paint brush into finish paint
- Load the roller sufficiently.
- Cut excess paint – to prevent surface runs and drains
- Apply finish paint over the bricks – back and forth smoothly
- Repeat the previous steps until the entire surface is covered
- Leave the paint to dry for 30 minutes
- Apply second coat to improve strength and boost outlook impression
Step 10: Quality finish
Upon application of the second paint coat, line the final layer with a lighter paint solvent in order to attain excellent finish results.
Alternatively, you can’t use a paint sprayer in order to attain best finish results. Cover the painted brick with polyethylene bag if it’s found is dusty area to prevent it from staining.
Alternatively, sprinkle water over the painted surface after sometime to keep off dust (this works for oil-based paint only).
Problems Associated with painted Bricks?
Painted bricks are susceptible to some of the following problems especially when wrong paint and application method is undertaken.
1. Chipping
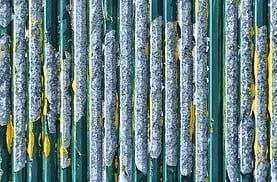
Chipping a condition that occurs when paint disintegrate from a given section and fall in form of a powder or particles. Usually, paint may chip when exposed to excess internal heat or humid exposure.
Heat breaks the paint molecular structure and hence allows the individual paint particles to fall.
On the other hand, hydrate paint layer chips due to unmatched internal strain and continuous hydrostatic pressure within the paint layer. Chipping is more pronounced in wet areas than dry ones.
See Also: Painting your Stairwell
2. Peeling and flake
Peeling occurs when the stickiness ability between paint molecules and brick surface is lost due to age or other external factors.
The paint adhesive bond fails to remain stuck on brick primary material and ends up forming a continuous sheet or flake.
Paint peel or flake when exposed to excess heat, dust, and alkaline condition. Moreover, incomplete surface preparation and wrong paint application procedure may also initiate peeling or flaking with time.
3. Aging
When aged, the paint structural formulation is weakened, while the adhesive capacity is lost. Aged paint breaks and weather easily – it loses its overall beauty.
Upon aging, paint tend to peel, chip and even flake. Factors that accelerate paint-aging process include acidity, excess heat, and dust particles.
4. Fading
Fading is a condition where the paint loses its original color with time – it becomes dull or less dense. Normally, low quality paint or expired paint is highly susceptible to fading.
Precautions When Painting Brick
When painting brick, stick to precautions and safety measures highlighted below:
- Always put on safety gear during paint application for your own personal protection
- Clean brick surface thoroughly before any paint application is done – to boost adhesion
- Strip old paint (if any) before applying fresh coat
- Always prime brick surface before applying finish coat layer- it helps prevent peeling and chipping
- Carry out a drop test experiment before actual painting is done – to ascertain stickiness ability
- Never smell stripping chemical, thinner, primer, or finish paint directly – the compounds may contain substances that can irritate your nasal cavity if inhaled
- In case you get into contact with paint thinner or stripping chemical, wash the surface with plenty of water and soap.
- Never use expired primer or finish paint when painting bricks – leads to peeling or chipping
On how to paint brick, you begin by selecting appropriate tools and materials required, then, clean the brick surface, strip old paint, sand the surface, repair damaged sections, and polish the surface before rinsing it to dryness.
See Also: Commercial Paint Sprayers
Conclusion
Besides, you’ll have to select and prepare primer, apply the primer, select and prepare finish paint (follow manufacturer’s instructions), apply finish paint, and undertake quality finish touch before leaving the surface to dry to touch naturally.
It’s advisable to cover painted surfaces that are located in dusty environment in order to prevent them from dust stains. Importantly, wear protective attire during paint application for personal safety and adhere to precautions given in this article.


