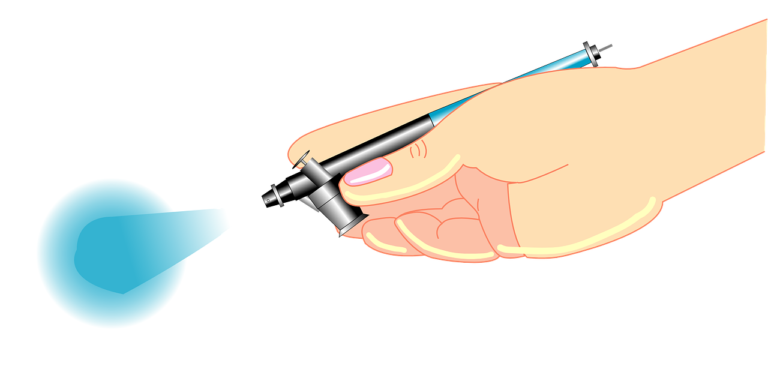
How Do I Get A Smooth Finish With Hvlp Sprayer?
Are you struggling to achieve that perfect, smooth finish on your projects when using a High Volume Low Pressure (HVLP) sprayer?
Don’t worry; you’re not alone! Many DIY enthusiasts and professionals encounter challenges when it comes to getting flawless results with HVLP spray guns.
In this comprehensive guide, we will explore the essential steps and techniques you need to know to ensure a smooth finish with your HVLP sprayer. Let’s dive in!
The Answer: Techniques for a Smooth Finish:
To achieve a smooth finish with an HVLP sprayer, follow these steps:
1. Preparation is Key
Proper surface preparation is crucial for a smooth finish. Clean the surface thoroughly to remove dust, dirt, and any contaminants.
Sand the surface to ensure it is smooth and free from imperfections. Fill any gaps, dents, or holes with suitable fillers and sand again until the surface is uniformly smooth.
2. Choose the Right HVLP Sprayer
Selecting the right HVLP sprayer for your project is essential. Consider factors like the type of material you’re spraying, the size of the job, and the spray gun’s nozzle size.
HVLP sprayers come with different nozzle sizes, and choosing the appropriate one can significantly impact the final result.
3. Proper Thinners and Ratios
Diluting the paint or finish to the correct consistency is crucial for an HVLP sprayer. Follow the manufacturer’s guidelines for thinning the material, and use the recommended ratios.
Using the right thinners and proportions will ensure proper atomization and a smooth application.
4. Adjust Air Pressure and Fluid Flow
Achieving the right balance between air pressure and fluid flow is essential for a smooth finish.
Start by setting the air pressure according to the manufacturer’s guidelines, and then adjust the fluid flow to achieve a uniform spray pattern. Fine-tune these settings as needed throughout the spraying process.
5. Test Spray on a Scrap Surface
Before applying the finish to your project, perform a test spray on a scrap surface to ensure that the spray pattern and consistency are correct.
This practice run will help you make any necessary adjustments before spraying the final project.
6. Maintain Proper Distance
Maintain a consistent distance between the HVLP sprayer and the surface being sprayed. Typically, this distance should be around 6 to 8 inches.
Holding the sprayer too close can result in a build-up of paint, leading to runs and drips, while spraying too far away can cause a dry, uneven finish.
Additional Techniques for Specific Surfaces
Wood Surfaces:
- Sand the wood with progressively finer grits to ensure a smooth base.
- Apply a wood conditioner before staining to promote even absorption.
- Use a high-quality stain or clear finish to enhance the wood’s natural beauty.
Metal Surfaces:
- Clean the metal surface thoroughly to remove rust, grease, and debris.
- Apply a suitable metal primer to enhance adhesion and prevent corrosion.
- Choose a high-quality paint designed for metal surfaces for the best results.
Common Challenges and Troubleshooting
Problem: Orange Peel Effect The orange peel effect refers to a textured surface that resembles the skin of an orange. It occurs when the finish dries too quickly or when the paint is too thick.
Solution: Reduce the air pressure slightly and increase the fluid flow. Also, ensure that the paint is properly thinned to achieve a smoother application.
Problem: Runs and Drips Runs and drips are caused by holding the sprayer too close to the surface or applying too much material at once.
Solution: Maintain the recommended distance from the surface, and apply thin coats with smooth, even strokes.
Problem: Blotchy Finish A blotchy finish can result from uneven thinning or poor application techniques.
Solution: Ensure consistent thinning of the material and apply the finish using overlapping strokes for an even coat.
Related: Woodworking HVLP sprayer.
Additional Questions
1. Can I use an HVLP sprayer for different types of finishes?
Yes, you can use an HVLP sprayer for various finishes, including paint, stain, lacquer, and clear coats. However, you may need to adjust the sprayer settings and thinning ratios accordingly for each type of material.
2. What is the recommended maintenance routine for an HVLP sprayer?
Regular maintenance is essential to keep your HVLP sprayer in top condition. After each use, clean the sprayer thoroughly with the appropriate cleaning solutions as per the manufacturer’s instructions.
Check and replace any worn-out or damaged parts, such as nozzles and seals, to ensure consistent performance.
3. Can I use an HVLP sprayer for large projects, such as painting walls?
While HVLP sprayers are ideal for smaller projects, such as furniture refinishing and cabinets, they may not be the most efficient choice for large-scale projects like painting walls.
For larger surfaces, an airless paint sprayer might be more suitable, as it provides faster coverage and higher paint flow rates.
Conclusion
In conclusion, achieving a smooth finish with an HVLP sprayer is a skill that can be mastered with the right techniques and practices. By diligently preparing the surface, selecting the appropriate sprayer and materials, and maintaining the correct settings, you can create professional-quality results on your projects.
- Remember to troubleshoot common issues like orange peel, runs, and blotchy finishes, and make necessary adjustments to improve your spraying technique.
With each project, you’ll gain valuable experience and confidence, leading to even better results in the future. So don’t be discouraged if your first attempts aren’t perfect; keep practicing and refining your skills. Soon, you’ll be amazed at the smooth, flawless finishes you can achieve with your HVLP sprayer.
So, What next?
Now that you have the knowledge and insights to achieve a smooth finish with your HVLP sprayer, it’s time to put your newfound skills into action. Pick a small project to start with, such as refinishing a piece of furniture or adding a fresh coat of paint to a wooden surface.
- Apply the techniques you’ve learned in this guide, and don’t forget to practice on a scrap surface before tackling your main project.
- Share your experiences and results with the community. Whether you encounter challenges or achieve outstanding outcomes, your journey can inspire and help others on their quest for a smooth finish.
- So, join online forums, social media groups, or DIY communities to exchange tips and learn from fellow enthusiasts.
Remember, becoming a pro with your HVLP sprayer takes time and dedication, but the satisfaction of creating beautifully finished projects is well worth the effort. Happy spraying!