How To Paint A Ceiling Without Roller Marks
Perhaps you have come across a ceiling with roller marks and wonder how to eliminate them when painting, and you’re wondering how to beautify your room.
On how to paint the ceiling without roller marks – to achieve that beautiful room look – undertake great surface preparation/ cleaning, painting tools selection, paint selection/preparation, actual painting, and paint finish techniques.
Moreover, the individual procedures for painting the ceiling must be adhered to as per the given instructions without overlooking precautions and safety measures associated with paint application.
See Also: Bathroom Ceiling Paint to Prevent Mold
Details: How To Paint A Ceiling Without Roller Marks
It will help if you have paint removers when painting to correct any errors during application.
a. Painting tools selection
Tool selection is the most critical step in achieving quality finish when painting since tools determine the paint pick-up and release effectiveness. Ensure to remove all excess paint from the roller as you’re putting the paint roller to get different paint. When painting, you will need some of the following devices for tools/items in place:
- Stand-alone ladder and paint tape
- Dropcloth and Scrapper
- Primer – optional
- Sanding material and thinner
- Polishing cloth and old newspaper
- Thick roller nap and thin roller nap
- Angled paintbrush and round paintbrush
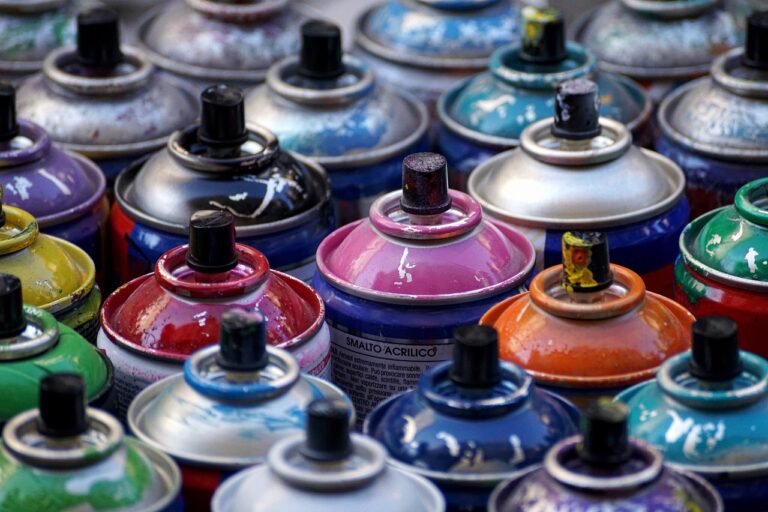
- Ceiling paint and paint remover
NB: Not every tool may be used during the painting process. Some ceiling surfaces demands different tools. However, you will need to have at least the listed tools in case of immediate considerations when painting.
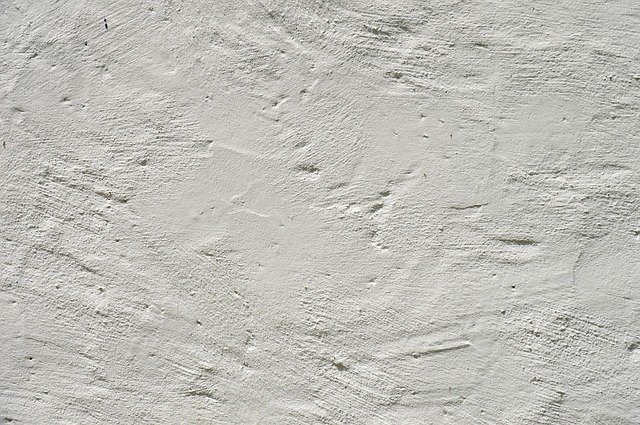
b. Surface Preparation/Cleaning
The ceiling must be cleaned thoroughly before the paint application begins. In this regard, a newly constructed ceiling should be left to dry completely before painting. You can accelerate the drying process by warming the room gently for some time.
When restoring a painted ceiling, scrape off the old paint with a blunt knife or scrapper gently – avoid destroying the primary surface material. Then, sand the surface appropriately.
You can fill the damaged ceiling with putty or sealant before polishing to eliminate protrusions or leakages that may lead to streaks or roller marks when painting. Moreover, wipe the ceiling entirely to remove dust or debris from the surface – these remnants weaken the paint stickiness and cause peeling action with time.
NB: Concrete ceiling should not be sand to avoid structural distortion. Instead, the surface should be finished using fine cement plaster in the right ratio.
See Also: Fixing Peeling Paint On Ceiling
c. Paint Selection and Preparation
Select ceiling paint according to the type of primary ceiling material. The paint used on a concrete ceiling may not work best when used on a wooden ceiling or granite ceiling. Some water-based paints often peel or chip when applied on a humid concrete ceiling without priming.
On the other hand, acrylic paint won’t work correctly on granite ceiling material without a proper thinning process. Marine board ceiling requires thin oil-based paint (not in the kitchen or fireplace) for the perfect finish, while the wooden ceiling is best painted with acrylic latex paint.
It is essential to thin thick paint appropriately for easier pick-up by the roller or paintbrush during paint preparation. Paint over dilution will lead to excess drains and dripping when painting.
Usually, you will need to carry out a drop test on the ceiling surface to ascertain the effectiveness of a given paint concentration before the application process commence. Moreover, it’s required that you follow the manufacturer’s instructions appropriately when preparing the paint.
d. Actual Painting
To carry out the painting process, you need to follow some of the following steps to the dot. The steps differ slightly (as explained) according to primary ceiling material.
You may also use the double coating or laying tactic through spraying on different courses while spraying your walls and selling.
1. Prime the ceiling
A porous and new drywall ceiling should be primed before any painting process begins – this improves the surface stickiness ability. Though some paint does not require priming when painting, porous/humid walls should be primed to reduce peeling and chip action due to reduced stickiness action.
2. Set the masking tape
The maskin tape applies to the ceiling that is painted with different paint-color designs. When setting the tape, it should be aligned so that the side to be painted lay on the tape’s inner side. It would be best to allow the paint to dry (select fast-drying paint) before re-setting the tape.
See Also: Paint Brushes for Oil Based Paint
3. Cut all corners with a paintbrush before rolling.
Roller painting may not reach the corners sufficiently when painting. You will need to use a paintbrush to cut all corners and edges before you start roller-painting. Angled paintbrushes with tapered tips are best for edges, while round paintbrushes work excellent for paint application corners.
When cutting corners, load your paint slightly and apply gentle force when painting to avoid dripping on the sidewalls – wipe out immediately with soapy detergent or use paint remover.
4. Less paint load in roller
When loading your roller, use less paint to prevent roller marks on the ceiling – excess paint leads to a thick layer, which drains or drips as the application occurs.
You need to remove excess paint on the roller edges when loading to prevent roller marks. If required to use a sprayer, you may employ an airless sprayer – avoid air or HVLP sprayer.
5. Use a thin roller nap
The thickness of the roller nap should be as minimal as possible. Thicker roller nap produces a sloppier paint layer that is thick and ugly stipple. Indeed, a thick roller nap creates conspicuous roller marks that are more tedious to smoothen with a paintbrush.
Consider buying a ¾” roller nap with fine finish material and perfectly trimmed to prevent side paint release when painting.
6. Rolling technique
When paint rolling, move your paint loaded roller in one direction of the ceiling continuously. Then, change the direction of rolling – the opposite direction. These rolling techniques help eliminate roller marks that may have been formed before drying out (for fast drying paints).’
Typically, the first coat should be rolled in one direction while the other takes the other rolling direction. Do not over press the roller on the ceiling when roll painting (may cause roller marks) – high-quality paint should stick instantly upon contacting the ceiling’s primary surface.
NB: Always run your roller from painted section than dry areas to prevent/reduce roller mark formation.
7. Flat paint sheen
Sheen determines how shinny the ceiling finish will appear after painting. Paint could either be satin (little sheen), semi-gloss (medium sheen), gloss (very high sheen), or flat (no sheen).
Consider flat sheen paint for your ceiling painting activity – this particular paint has no sheen thus won’t reflect tiny roller marks left behind.
8. Multiple layers
The newly painted ceiling should be coated with several paint layers to improve stickiness and durability. Usually, appropriate rolling techniques (directional) should be used when painting.
The subsequent layers should only be applied after the previous once have cured to improve stickiness strength. Multiple layer painting reduces the ruggedness (on the ceiling material) that may initiate roller marks when painting.
See Also: White Paints for Interior Walls
9. Use of ladder
Set a stand-alone ladder at an appropriate height that you can access the ceiling without straining. The roller motion should be smooth at that selected ladder’s height without over pressing.
Utilizing the ladder while painting with your roller will significantly get rid of roller marks – you get to employ an extension pole while you’re getting to reach the ceiling surface.
Besides, it would help if you cut edges when painting without frequent shifting of the ladder—having an assistant person when painting reduces the hassle of setting the ladder or even toughing it with paint-stained hands.
10. No overfilling
Avoid overloaded roller or paintbrush as it causes drains and leaves roller marks when painting. Upon application of rolling force, the paint spreads to the edges leaving side drains and drips.
You must clean excess paint (squeeze) before application – the best method of reducing paint load is by running the roller over a tray that picks excess paint.
11. Spray the ceiling
The best method of eliminating roller marks is by use of a ceiling paint sprayer. The sprayer releases paint in small quantities that stick uniformly, forming a thin, smooth final finish.
Though the method is slightly expensive (compared to paintbrush and roller), it guarantees quality service and minimal wastage during the application process.
Importantly, spray painting is faster and improves stickiness ability due to extra painting force from the sprayer.
See Also: Brushes for Latex Paint
e. Paint finishing
Once the entire ceiling is painted, inspect keenly on points that may have roller marks. Remove any existing roller marks using a soft nap roller – you need a 1/2” roller nap with a fine material finish for efficient performance.
When eliminating roller marks, run the soft nap roller gently on the section with roller marks until they are eliminated.
A small sized paint roller is the best for roller marks elimination – it reduces direct contact with adjacent areas without any roller mark. Leave the newly painted surface to cure naturally without any warming or overcooling.
NB: Never sand painted ceiling trying to remove roller marks – sanding creates scratches and dislodge primary material eventually.
Safety Measures and Precaution to Consider When Painting a Ceiling
Successful painting without roller marks is not until safety measures, and precautions are put in place. Consider some of these precautions and safety measures when painting your ceiling:
- Never use a ladder without a ground stopper when painting – prevents sliding.
- Wear painting gears always – face mask, respirator, hand gloves, overalls, boots, and eye goggles for painting
- Avoid painting when standing on a wet floor – you may accidentally slip and injure yourself. Moping should be done before painting commences.
- The polished ceiling should be cleaned thoroughly to remove dust particles that may weaken the paint stickiness when painting. More so, breathing dust/dirt cause nasal irritation.
- Thin, thick paint before rolling to avoid roller mark creation
- A porous ceiling and drywall ceiling should be primed to improve paint stickiness strength.
- Appropriate paint should be selected according to the nature of the primary surface material of the ceiling.
- The stand-alone adjustable ladder should be used when painting to access the ceiling at ease – avoid ladder that leans on the wall (it may slide when painting and don’t support maximum access of ceiling center when painting)
- The floor should be covered with a plastic cover or newspaper to prevent dripping paint (from the ceiling) from staining the floor.
- Clean the paint-stained section with water and soap or paint remover immediately before it dries out
- Over diluting will cause excess drips and drains when painting.
- Always follow the manufacturer’s instructions when preparing paint.
- The kitchen ceiling and fireplace ceiling should never be painted with oil-based paint – may catch fire.
NB: Consider paint sprayer as the best alternative for excellent ceiling paint without roller marks.
How to Remove Roller Marks from Dried Paint from the Ceiling
Dried roller marks may be challenging to repair due to continuous reinforcement of the paint and primary surface material. However, you can still achieve a classic finish if you follow the steps below:
a. Mark and clean the area with roller marks
You will need to identify the section with roller marks and scrap it off gently using the scraper. Make sure you don’t extend too far on the adjacent area in the process.
b. Prime The Clean Area
Primer is usually applied for the porous ceiling and new drywall ceiling to improve stickiness strength. Besides, some water-based paint will always need a primer (as per the manufacturer’s instructions) before the actual application.
c. Prepare the paint and apply
Dilute or thin paint appropriately and apply gently using a soft paintbrush or a roller on the cleaned section. To achieve the best finish result, use the paint sprayer instead – the sprayed paint perfectly merges with the adjacent old paint layer without any roller marks. Leave the painted surface to cure naturally.
Conclusion
Roller marks are common problems experienced when painting a ceiling. Suppose you want to succeed in painting a ceiling without roller marks?
In that case, you will have to consider the following step appropriately: surface preparation/cleaning, painting tools selection, paint preparation, actual painting, and paint finish techniques keenly.
You must also adhere to safety measures and precautions highlighted in this article for your health safety when painting.
Remember, high-quality final finish calls for the best method, which is a function of more financial input. You can consider a paint sprayer as a better alternative for a roller or paintbrush.