How to Paint Wood Texture with Acrylics
Painting wood texture with acrylics may at times be a cumbersome task if the wrong approach is undertaken.
You may even be willing to coat wooden structure with acrylics or intends to restore your previously painted wood and wonders how to do it. 
Well, in this article, we shall be discussing how to paint wood texture with Acrylics. To begin with, you will need to select appropriate tools, prepare the wood texture sufficiently, prime the surface (where necessary), select, and prepare acrylic paint accordingly.
Moreover, carry out actual painting stepwise and attain a professional finish before letting the wooden surface to dry completely. It’s advisable to wear appropriate protective gear when painting to safeguard yourself from any health hazard that may occur.
See Also: Playset or Swing Set stains
Details: How to Paint Wood Texture with Acrylics
a. Tools and Item Selection
- A putty knife or paint scraper
- Steel brush and a paintbrush
- Empty bucket and water point
- Wide polyethylene paper cover
- Vacuum Cleaner and masking tape
- Primer and acrylic paint
- Sandpaper and polishing machine
b. Surface Preparation
Surface preparation entails three major activities (sanding, polishing, and debris removal).
The process aims at eliminating the surface waste and improving the stickiness ability to paint over a given wood texture.
- Sanding
Using a rough grain sandpaper, sand the wood texture surface gently to level ruggedness and dislodge unkempt surface grains.
Avoid fast sanding as this may cause abnormal chipping or wood grains from the surface or create bad run impressions on the surface material.
Further, use fine-grain sandpaper to achieve smooth surface texture. When sanding, the motion of the sandpaper should be along with the wood grain orientation.
Otherwise, crossing grain structure may cause excess grain disintegration and the finish quality may be compromised.
See Also: Staining Pressure Treated Wood
- Polishing
Connect the polishing machine to a power source and run over the wood texture gently to attain a perfect finish – this may not be attained by the sanding process alone.
You should run the polishing machine along with the grain orientation and avoid over pressing, which may end up creating uneven surface terrain.
Remember, not all surfaces need fine polishing. You will require to consider the intended use of wood texture (if it’s for artwork, polishing is necessary. However, wood texture for deck or fencing may not necessarily need polishing; sanding is enough).
- Debris removal
Blow off dust and debris left on the wood texture surface after polishing and sanding. Dust affects the stickiness of paint upon application and often initiates peeling or chipping with time.
You can also clean their dust using a paintbrush. However, this method may not be that perfect as compared to a blower.
In case the wood texture meant for artwork, it’s advisable to mop the surface with clean water (treated wood) to remove fine dirt that may not blow off.
NB: Never leave polished surface uncleaned. Avoid wetting wood texture that is not treated (pressure treatment, chemical treatment, etc.)
See Also: Sanding Walls before Painting
c. Surface Priming
Select appropriate primer for the wood texture (this should be determined by the final acrylic paint you want to use). Prepare the primer according to the manufacturer’s instructions.
Then, coat the wood texture entirely sing a paintbrush.
Primer is recommended for rough grain wood texture, newly painted wood structure, or aging wood texture that is under paint restoration.
Primer improves the stickiness quality of the final paint layer. Some finish paints are self-priming. In such cases, you will not require to prime your surface.
Also, you can determine the type of wood not to prime according to the nature of wood grain orientation and texture strength.
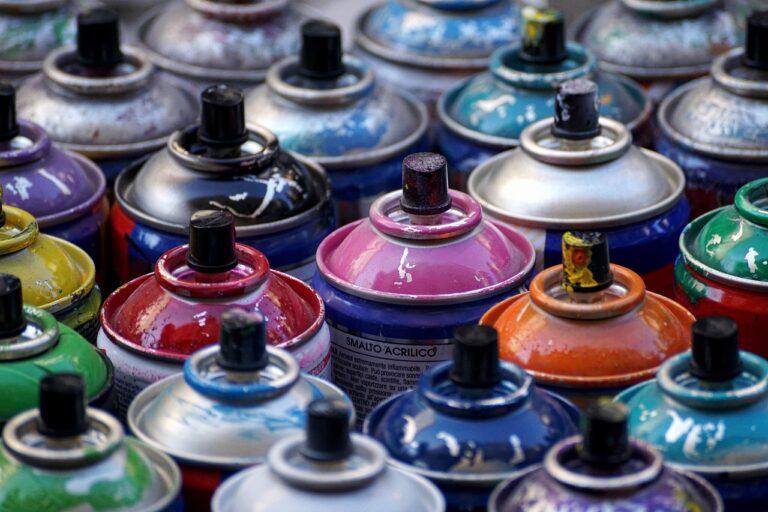
d. Acrylic Paint Selection
When selecting the acrylic paint for wood texture, you need to consider factors such as color, quantity, stickiness strength, durability, and ease of application.
Purchase acrylic paint that comes in a variety of colors, packed in various quantities (for optional selection), more comfortable to prepare, apply, and remove, durable, and self-priming if possible.
Moreover, it is advisable to buy acrylic paint that creates minimal drains/runs during paint application and eliminates mold/mildew growth for damp areas.
Notably, order paint that works with a single coat layer (reduces cost) and fast drying.
e. Acrylic Paint Preparation
During acrylic paint preparation, you will need to read and follow the manufacturer’s instructions accordingly. However, the basic guiding procedure entails mixing the paint in a container.
Then, dilute slightly using thinner (where indicated) to attain appropriate viscosity.
Test the diluted paint with a paintbrush to see the loading level (a properly diluted acrylic paint should load on the paintbrush with minimum drain upon lifting over the container).
Further, carry out a drop test experiment over the wood texture you intend to paint to ascertain the stickiness action before the actual painting.
f. Actual Painting
Dip a paintbrush in acrylic paint and load sufficiently. Gently, apply the paint back and forth to coat the wood texture. Repeat the previous step until you cover the entire wooden surfaces.
You can change the painting direction to attain a perfect finish and eliminate drains or runs during paint application. Moreover, consider angled tip paintbrush when clearing runs that may occur, especially vertical wood texture.
Don’t overload paintbrush (create drains) or apply double coat before drying has occurred – you need to leave the first coat to dry sufficiently and assess if there is a need for any other subsequent coat application needed.
Besides, observe overall outlook appearance before correcting any paint error on the surface. A wide paintbrush should be used on flat surfaces with a narrow paintbrush should be considered when cutting corners and eliminating edges that are not fully painted.
See Also: Wooden Deck Sealer
g. Final Finish
Upon paint application, leave the surface to dry over the prescribed time – check instruction from the manufacturer’s labels.
Acrylic paint is sensitive to dust; therefore, you will need to sprinkle cold water after 10 minutes to eliminate dirt particles from settling on the surface.
Alternatively, you can cover the surface (without direct contact) with a piece of polyethylene bag to keep off dust and debris from the painted surface.
Correct any paint drain from the surface before it is dried out. Otherwise, dried runs/drains are cumbersome to correct and leave a non-uniform paint finish, which may not be that impressive.
NB: Never touch the painted surface until it’s dry to touch – you will create finger impressions on the wood texture.
See Also: Using Acrylic Paint On Metal?
How to Maintain Wood Texture Painted with Acrylics
Maintenance is a vital activity in improving your wood texture upon acrylic paint application. In this regards, it’s advisable to consider some of these maintenance tips to improve the paint service life too:
- The acrylic wood texture should not be subjected to excess water/direct water logging – this action initiates chipping, scuffing, or peeling occurrences.
- You can wax edges of wood texture to limit peel/chip triggers – peeling usually begin at the edges where there is paint discontinuity.
- Clean your acrylic painted wood texture often with a wet clean piece of cloth to eliminate dust particles and surface debris, which weaken the pain layer with time.
- In case of surface scratch, repair the damaged wood section with similar acrylic paint immediately. By doing so, you will be preventing further damage and peeling or chipping action from occurring.
- For wood texture in a rainy environment, it’s advisable to prime the surface sufficiently and carries out paint restoration in one or two years’ time to protect the wooden structure from aging faster.
- Open field wood texture should be sprayed or coated with protective chemicals that keep of burrowing insects and animal stains.
- Never sand acrylic painted wood texture when cleaning surface dust or stain – you end damaging primary surface grain structure.
- For hot climate areas, cover your acrylic painted wood texture with transparent vinyl that integrates UV-ray’s protective aspects.
See Also: Paint Sprayer Under 200
Safety Measures to Consider when Painting Wood Texture with Acrylics
Safety is paramount when painting using acrylic paint or primer. You will therefore need to follow the precautions highlighted below to prevent health-related problems.
- Always put on protective gear when carrying out acrylic painting activity on wood texture, i.e., respirator, facemask, hand gloves, boots, eye goggles, and overall.
- Avoid painting wood texture with acrylic paint if it’s meant for fireplace – the paint is oil-based and may initiate fire upon contact.
- All acrylic painting works should be carried out away from the fireplace – thinner or acrylic paint is flammable and may cause a fire outbreak.
- Acrylic paint coat should be applied over acrylic-based primer (oil-based primer). Never apply acrylic paint over latex or water-based primer – this acts as lower stickiness strength thus initiating chipping or peeling action with time.
- Always carry out a drop/spot test experiment on the wood texture upon preparation of acrylic paint/primer to ascertain stickiness action before actual painting in dining.
- Avoid mixing two different types of acrylic paints (unless otherwise directed by the manufacturer) as this affects the stickiness strength of the resultant paint and may cause peeling action with time. Further, the varying chemical components in the paint may lead to a weaker chemical formulation that is unsuitable for wood texture.
- Before paint preparation, always check the indicated expiry date on the container. Return expired acrylic paint or dispose it of immediately.
- Avoid touching freshly painted wood texture (creates fingerprints on the surface).
- Clean a paintbrush with thinner or turpentine after using it on acrylic paintwork to prevent hardening of filaments.
- Unused paint or remainder should be kept away from pets and children to prevent any intoxication if swallowed or inhaled.
- Don’t inhale acrylic paint or primer directly – it may contain fumes that can choke or irritate your respiratory system.
See Also: Wooden Deck Stain
Conclusion
By choosing to read this article on how to paint wood texture with acrylics, I believe you’ve gained in-depth skills that are sufficient to carry out your DIY projects without any problem.
Apart from having a wood texture to paint, you also need to identify the prevailing weather conditions.
Then, select appropriate tools, prepare the wood texture sufficiently, prime the surface (where necessary), select, and prepare acrylic paint accordingly to attain incredible stickiness level.
In addition, carry out the actual painting stepwise before letting the wood texture dry sufficiently.
Remember, wearing safety gear is paramount in protecting your health, and adhere to precautions given strictly when painting wood texture with acrylics.