How to Refinish a Deck
If your deck is faded or bleached; then, refinishing is urgently required to restore its initial beauty. The process of refinishing may not be easier, especially when the low-quality stain is used and the wrong procedure is followed. 
Usually, the deck’s finish coats peel and scuff with time due to poor surface preparation and inappropriate stain matching. Could you be facing similar problems?
On how to refinish a deck – select the material and tools required, pre-clean the surface, strip old paint, sand, wash, repair, and fill damaged sections before carrying out final polishing.
Besides, you need to select and prepare deck stain, re-stain the deck, select and prepare the finish paint, and apply the finish paint (using a paintbrush or a roller). For quality deck finish, you may consider sealing the final paint coat with Thompson’s sealer.
Details: How to Refinish a Deck
Remember; when painting, it’s advisable to wear protective gear and adhere to precautions highlighted in this article for your safety purpose. The materials and tools required are:
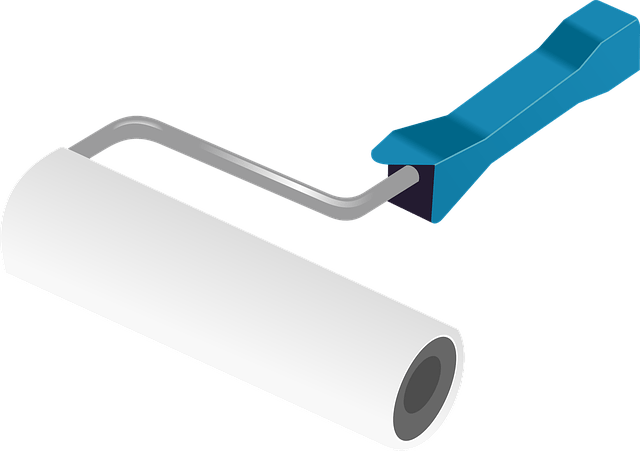
- A paintbrush or a roller
- Stain and thinner
- Power washer and water point
- Empty bucket and paint scrapper
- Paint stripping chemical
- Filler and Polishing machine
- Sander or a Sandpaper – medium grit 80 to 120 grit
- Finish Paint and Blower
- Protective gear – gloves, goggles, overalls, boots, respirator, and facemask
Step1: Pre-surface Cleaning
- Wear protective gear – gloves, boots, respirator, overall, and goggles – for safety purposes
- Sweep the deck surface with a broom to eliminate dust and surface debris
- Mop or pre-clean the deck with water and soap if need be
Step 2: Stripping of old paint/stain
- Prepare paint stripping chemical as per manufacturer’s instructions
- Using a paintbrush, apply the stripping chemical over the deck – back and forth
- Repeat the previous step until the entire deck surface is stained
- Leave the surface to cure for 30 or so advised by the manufacturer
- Gently, scrape off the old paint with a paint scraper. Be careful not to destroy the primary surface material
- Repeat the previous step until the entire paint/stain is removed
- Blow off scrubbed paint and clean the surface
Step 3: Sanding
- Connect the sander to a power source and switch on
- Gently, sand the paint stripped surface to remove any paint remains and rough protrusions
- Repeat the sanding action until the entire surface is well sanded. Be careful when sanding to prevent damaging of deck’s surface material
- Alternatively, sand the surface with medium-grit sandpaper – 80 to 120 grit
- Using a blower, blow of dust and surface debris. You can also sweep
See Also: Painting Vs Staining Deck
Step 4: Washing/Cleaning
- Connect a power washer to power and switch on
- Plug-in the hosepipe to a water point and turn on the tap
- Apply soapy detergent and scrub to clean the surface
- Wash the polished surface (using a power washer) until soap is cleaning
- Rinse the surface to dryness
- Leave the surface to dry completely – around 20 minutes
Step 5: Repair and Filling the Gaps
- Repair porous surface and damaged sections
- Re-fill the gaps and holes with patching compound or filler
- Using a putty knife, remove excess filler
- Leave the filler to dry to touch
Step1: Final Polishing
- Connect the polishing machine to a power source and switch on
- Gently, polish the filled surface to attain a smooth finish lining
- Alternatively, you can use fine-grit sandpaper when polishing
- Sweet or blow off polished dust
- Mop and rinse the surface
- Leave the deck to dry to touch
Step 6: Selecting and Preparation of Deck Primer Stain
When selecting your primer stain for the deck, consider factors such as the deck location, the prevailing climatic condition, the type of deck material, the type of finish paint to use, the surface area of the deck, and the number of coats to apply.
Choose waterproof primer when priming deck located in a wet area to prevent peeling and acrylic latex primer for temperate climatic regions. Moreover, you need to check the UV-rays blockers before purchasing your primer for use in sunny areas.
More so, the deck found in a sunny environment should be primed with lighter/translucent stain to boost the reflection of solar radiations.
- Gently, pour the primer stain into an empty bucket
- Thin the primer as per the manufacturer’s instructions
- Test the thinned primer over the deck surface to assess the stickiness action
Step 7: Re-staining Deck
- Dip the paintbrush into the primed solvent and load it appropriately
- Cut off the excess primer
- Apply the primer – back and forth
- Repeat the deck staining steps above until the entire surface is well-primed
- Leave the primer to dry to touch
NB: Avoid overloading the paintbrush as it causes drains or runs on the deck surface.
Step 8: Selecting and Preparation of Finish Paint
When selecting the finish paint, you need to match the solvent with the type of primer used (oil-based primer should be coated with oil-based finish paint and vice versa).
Further, consider finish paint, which is waterproof (for wet/humid areas), UV-rays resistant (for the sunny environment), and fast-drying.
- Gently, pour finished paint into an empty bucket
- Thin the paint sufficiently – as per the manufacturer’s instructions
- Stir the paint thoroughly to attain a uniform solvent
- Carry out a drop test experiment to ascertain the stickiness level
NB: Do not over dilute finish paint – the coating layer may be weak and susceptible to wear and tear upon abrasive force.
See Also: Sanding Between Deck Boards
Step 9: Repainting the Deck
- Dip a roller or a paintbrush into a finished paint and load it sufficiently
- Cut off excess paint to prevent drains or runs
- Apply the paint over the surface back and forth
- Repeat the steps above until the entire surface is painted
- Leave the first coat to dry as per the manufacturer’s instructions
- Apply the second coat and leave it to dry naturally
Step 10: Quality Finish
For a quality finish, it’s advisable to seal your deck with Thompson’s Seal as advised further in this article.
For a deck located in the dusty region, cover the surface with a polyethylene bag to prevent it from dust stains.
See Als: Is Composite Decking Worth It?
How to Seal Your Deck for Protection
Sealing deck after finish coat application is important as it improves deck’s surface life and prevents peeling and scuffing, which is paramount in wet and dry areas.
To carry out the deck paint sealing process, will need to follow the steps/procedure (with the materials and tools) highlighted below:
- A paint sealer and thinner
- A roller or a paintbrush
- Blower and respirator
- Dust coat and gloves
- Goggles and boots
- Paint sprayer and rag
- Waterpoint and an empty bucket
Step 1: Surface cleaning
- Wear protective gear for safety
- Blow off dust particles and debris from the deck surface
- Mop the surface and leave it to dry to touch
Step 2: Sealer preparation
- Pour the sealer into the bucket
- Thin the sealer appropriately if need be
- Stir the sealer to attain uniform solvent
- Test the sealer over the deck surface to assess the stickiness level
NB: Well-thinned sealer should load a paintbrush with minimal drains.
See Also: Deck Cleaner for Trex
Step 3: Apply the Sealer
- Dip a paintbrush or a roller into the sealer
- Load the brush sufficiently
- Cut off excess sealer to prevent surface runs
- Apply the sealer on the deck surface – back and forth gently
- Repeat the steps above until the entire surface is sealed
Step 4: Quality Finish
Leave the sealed surface to dry naturally. You can sprinkle water over the sealed deck to keep dust from the surface.
Alternatively, cover the deck with a polyethylene bag until the surface is dry to touch.
Precautions to Consider When Refinishing Your Deck
During beck refinish process; follow precautions and safety measures highlighted below:
- Always wear protective gear (goggles, boots, respirator, overall, and gloves) to boost personal safety.
- Before making your purchase, check the type of paint and area of use. Match the paint to the deck material
- Consider the primer used before ordering your finish paint – oil-based primer should be coated with oil-based finish paint and vice versa.
- Where possible, seal the finish coat to boost the deck’s service life and eliminate peeling and scuffing.
- For deck found in wet areas, waterproof paint and primer should be used, while deck found in the sunny area should be coated with paint that integrates UV-ray blockers
- Never smell primer, paint, or thinner directly as they contain components, which may irritate your nasal cavity if inhaled.
- In case you get into contact with thinner or stain, wash the section with plenty of water and soap.
- Always follow the manufacturer’s instructions when preparing finish paint or thinner.
- Before preparation, check the expiry date of thinner, primer, or finish paint. Never used expired product – return to the manufacturer if possible.
- Importantly, carry out a drop test experiment (over the deck surface) before applying primer or finish paint.
Conclusion
In summary, on how to refinish a deck, you begin by selecting the material and tools required, pre-cleaning the surface, stripping old paint, sanding, washing, repairing, and filling damaged sections before carrying out final polishing.
Further, you need to choose and prepare deck stain appropriately, re-stain the deck, select and prepare the finish paint, and re-paint the deck (using a roller or a paintbrush).
In order to achieve a quality deck finish, it’s advisable to consider sealing the finish paint coat with Thompson’s sealer.