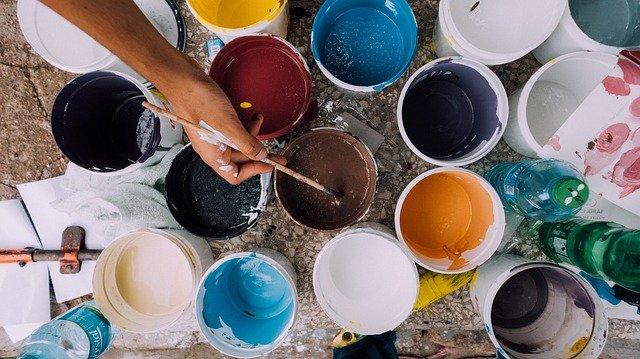
How to Remove Paint from Brick
Whether it’s concrete walls paint, acrylic, or latex paint, proper procedure, and thinning chemicals should be used to attain excellent paint removal from Brick. 
On how to remove paint from brick; use either Trisodium phosphate (TSP), paint stripper/thinner, soda blasting method, paint scraper and thinner, or by use of power washer.
Besides, you can opt to use an absorbent paint stripper, sandblaster or paint grinder, pressure washer, or you consider a stripping chemical.
Each paint removal method has a certain administration procedure (in this article), you must stick to details and instructions given or otherwise advised by the manufacturer.
See Also: Paint Stripper for Concrete
Details: How to Remove Paint from Brick
Putting on protective gear is crucial for your own safety purposes while adhering to precautions given helps avert problems or disasters that may occur during the paint removal process.
Method 1: Using Trisodium phosphate (TSP)
Trisodium phosphate acts by breaking the paint layer into a thick viscous fluid, which is more comfortable to scoop from the surface with a paint scraper.
Materials and Tools Required
- Trisodium phosphate and Warm water
- Steel brush and Water point
- Paint scraper and a roller
- A piece of cloth and Soapy detergent
- Respirator and Eye goggles
- Dust coat and hand gloves
- Boots and Empty bucket
Procedure
- Wear protective gear (dust coat, facemask, boots, gloves, and goggles) for personal protection
- Clean the brick surface with a broom or blow off the dust to remove debris and dust particles
- Dilute Trisodium phosphate sufficiently using warm water in a bucket – follow manufacturer’s instruction
- Dip the paintbrush or a roller in TSP solution and apply over the brick surface
- Repeat the steps above until the entire surface is well stained
- Leave the surface to cure for 6 to 12 minutes
- Using a paint scraper, scoop the paint from the surface gently
- Repeat the previous step until the paint is completely removed
- Wash the brick with soapy detergent to remove traces of TSP
- Rinse the surface with clean water and leave it to dry
NB: Trisodium phosphate emits poisonous fumes and therefore, special care should be put into place to prevent intoxication – inhaling TSP may chock your respiratory system.
See Also: Rust Remover for Concrete
Method 2: Using Paint Stripper or Thinner
Paint stripper or thinner contains active ingredients, which aids in paint breakdown and structural disintegration upon application.
The solvent will remove either wet or dried acrylic/latex paint without any problem.
Materials and Tools Required
- Paint striper and
- Detergent and Deck brush
- Paint scraper and Eye goggles
- Overall and Water point
- Gloves and Respirator
- A piece of cloth and steel brush
Procedure
- Wear protective attire and clean the surface sufficiently with a steel brush to remove debris
- Pour paint stripper into a bucket and dilute it slightly – follow manufacturer’s instructions
- Carry out a drop test experiment over the painted surface to ascertain the paint removal process
- Using a paintbrush, apply paint stripper over the bricks and leave it to quench – about 10 minutes
- Gently, scrape the paint from the brick (using a paint scraper) and scrub the surface with the deck brush
- Repeat the previous steps until the surface is clean
- Wash the brick with detergent (to remove traces of paint stripper and paint debris)
- Connect a hosepipe to the water point and rinse the brick sufficiently
- Leave the surface to dry naturally
Most paint strippers contain poisonous chemicals (methylene chloride), which may irritate your nasal cavity if inhaled or cause skin discomfort upon contact.
See Also: Concrete Driveway Paints
Method 3: Soda Blasting Method
For commercial paint removal, consider using the sandblasting method – the paint removal process will not only protect the brick from damage but also improve the overall surface strength.
Though the method is more expensive as compared to others (like thinner and scraper), it delivers excellent finish quality for both latex and acrylic paint removal.
Materials and Tools Required
- Blasting unit/machine – like a pot blast
- Respirator and water source
- Industrial sodium bicarbonate – baking soda
- Goggles and Overall
- Paintbrush and hand gloves
- Water source and respirator
- Power source and blower
- Wire brush
Procedure
- Put on appropriate safety gear – to protect you from blasting chemical or broken debris
- Using a wire brush, scrub and clean the brick surface gently – to remove dust and surface debris
- Connect the blasting machine to the power source and switch it on – make sure that all the valves are airtight before switching on.
- Gently, direct the sodium bicarbonate gust on the painted brick surface – ensure you stand about one foot away from the brick for personal safety
- Continuously, run the soda blasting action until the entire paint is removed
- Connect the hosepipe to the water point and wash the brick to remove traces of soda from the surface
- Mop (with a rag) and leave the surface to dry to touch
NB: Sodium bicarbonate won’t cause any pollution during application (it’s environmentally friendly).
However, soda has high pH, which damages bushes, flowers, and trees – it should not be used near such vegetation. When inhaled, soda fumes may cause nasal irritation.
See Also: Lift Acrylic Paint from Concrete
Method 4: Using a Paint Scraper and Thinner
Materials and Tools Required
- Paint Thinner like turpentine from Amazon
- Steel brush and Paint scraper
- Empty bucket and paintbrush
- Blower and piece of cloth
- Gloves and goggles
- Respirator and overall
Procedure
- Wear protective gear and blow off surface debris and dust particles (using a blower)
- Pour the paint thinner (turpentine) into a bucket and dilute slightly
- Test the solvent over the painted bricks – to ascertain the paint removal process
- Apply the thinner over the painted bricks and leave it to cure for 5 to 10 minutes
- Using a paint scraper, scrape the paint from the surface gently – be careful not to damage the brick structure
- Scrub the surface further (using a steel brush) and scoop off the paint debris using a scraper
- Clean the brick – with a paintbrush
- Wash the surface with soap and water to remove traces of thinner and paint remnants
- Leave the brick to dry to touch.
During thinning and application process, be careful since thinner emits poisonous fumes that may irritate your respiratory tract if inhaled – wear a respirator. Moreover, high concentrated thinner may affect the structural strength of the bricks.
See Also: Remove Spray Paint from Concrete
Method 5: Using Sand Blaster or Paint Grinder
By choosing to use sandblaster, you will remove paint (both latex and acrylic paint) without affecting the primary surface structure of the bricks.
However, you must be careful during the sanding process to prevent excessive surface erosion due to unmatched abrasive action.
Materials and Tools Required
- Sandblast medium – high-grade sandpaper
- Protective gear – Respirator, dust coat, and face mask
- Sandblaster or Paint grinder – should be rated 50 psi minimum
- Pressure cleaner and water point
- Blower and Empty bucket
Procedure
- Wear the protective attire and clean the brick surface with a broom or brush – to remove debris
- Plug the sandblaster into the power supply and switch on
- Gently, run the sandblaster over the painted brick – maintain the nozzle at an inclination angle between 30 to 45 degree for best performance
- Blast the brick surface (back and forth) until the entire surface is clean
- Connect the blower to a power source and blow off the dislodged paint from the brick surface
- Repeat the above steps until you completely clean the brick
- Wash and mop the brick (water and soap) and leave it to dry to touch
Remember, special skills are needed when using a sandblaster or paint grinder – in case you are new to these machines, contract a professional paint remover.
Moreover, the sandblaster method is slightly expensive as compared to the paint stripping option. See Also: Removing paint from concrete without chemicals.
Method 6: Using Power Washer and thinner
Materials and Tools Required
- Electric or Gas-powered power washer – the rating range is 1500 psi to 3000 psi
- Plastic sheet or a water-resistant cloth – picks paint drops
- Protective Attire – gloves, overall, dustcoat, boots, and respirator
- Paint thinner and detergent
- A clean piece of cloth and water point
- Paintbrush and an empty bucket
Procedure
- Wear protective gear and clean the painted bricks (using a paintbrush)
- Assemble the power washer – as per the manufacturer’s instructions
- Plugin the power washer to the power supply and test the nozzle flow rate
- Set the nozzle pressure (for best throttle velocity) and hit the switch button
- Quench dried paint with thinner – for easier removal
- Stand a few feet away and start the paint removal process – run the nozzle near the painted brick back and forth
- Repeat the stems above until the entire paint is cleaned
- Wash the paint-cleaned brick to get rid of paint debris and traces of thinner
- Rinse the surface with clean water and leave it dry naturally
The power washer demands a lot of water supply and works effectively when cleaning latex paint (no thinning is needed). See Also: Removing latex paint from concrete.
Method 7: Using Commercial Paint Stripping Chemical
Commercial paint stripping chemicals like Motsenbocker’s, Sunnyside Corporation are manufactured with active ingredients that break down the paint molecules to form a thick fluid, which is more comfortable to remove.
These compounds act instantly upon application and won’t damage brick’s structure if the right concentration is used.
Materials and Tools Required
- A Paint stripping chemical – buy from amazon
- Paintbrush and clean piece of cloth
- Protective gear – facemask, dustcoat, goggles, gloves, and boots
- Soap detergent and an empty bucket
- Waterpoint and thinner
- Steel brush or scrubber
Procedure
- Put on protective gear and clean the brick’s surface sufficiently
- Thin commercial paint stripping chemical in a bucket as per the manufacturer’s instructions
- Apply the thinned solvent over the painted brick and leave it to cure for 10 minutes or otherwise advised by the manufacturer
- Gently, scrap the cured paint (using a paint scraper). Alternatively, scrub the surface with a steel bush
- Wash the bricks with water and soapy detergent – to remove paint traces and stripping chemical
- Rinse the surface with clean water and leave it to dry
For quality paint removal finish, match the paint tripping chemical with the type of paint applied on bricks – oil-based paint should be cleaned using oil-based stripping chemical and vice versa.
See Also: Removing Paint From Concrete
Alternative Methods for Removing Paint from Bricks?
You can effectively remove paint from bricks by using either of the following homemade methods:
Method 1: Scrub with Brush and Soapy Detergent
Soapy detergents contain active components that break paint molecules (wet and dry paint) into a thick viscous liquid, which is easier to clean.
Moreover, the detergent can be used when removing both oil-based and oil-based paint sufficiently.
Materials and Tools Required
- Soap detergent and steel brush
- Waterpoint and empty bucket – two
- Protective gear and piece of cloth
Procedure
- Wear protective gear and clean the brick – remove surface dirt
- In a bucket, dilute soap detergent slightly and apply over the painted bricks
- Leave it to quench for 10 to 15 minutes
- Using the steel brush, scrub the surface gently (to prevent it from structural damage)
- Clean paint debris with water and rinse it sufficiently
- Leave the surface to dry to touch
See Also: Concrete Degreaser
Method 2: Using Alcohol – Rubbing Alcohol
Alcohol is suitable for latex paint and wet acrylic paint –the active ingredients break paint molecules to form a viscous fluid that is more comfortable to wipe off.
The alcohol concentrations should be medium (low pH) to prevent brick’s structural erosion.
Materials and Tools Required
- Alcohol and warm water
- Two empty buckets and a paintbrush
- Piece of cloth and water point
- Protective attire – Overall, gloves, respirator, and goggles
Procedure
- Put on protective gear and clean the brick’s surface
- Dilute alcohol slightly – add little warm water
- Using a paintbrush, apply alcohol solvent over the brick
- Coat the surface appropriately and leave it to quench for 10 to 20 minutes
- Use a paint scraper or a steel brush to scrub the painted surface – to remove the paint
- Clean the paint with a paintbrush and continue scrubbing
- Repeat the steps above until the entire paint is removed
- Wash the bricks with water and soap to remove alcohol traces and dislodged paint
- Rinse the surface with clean water and leave it to dry
NB: High alcohol concentration may irritate your skin upon contact. See Also: Stes for Paint Concrete.
Method 3: Heat Gun Method
The heat gun method is suitable for both dried/wet acrylic and latex paint – the heat composition breaks the paint bonds hence making it more comfortable to scoop with a paint scraper.
Materials and Tools Required
- Heat gun and warm water
- Empty bucket and power source
- A clean piece of cloth and paintbrush
- Protective gear and water point
- A paint scraper
Procedure
- Clean the painted brick sing a paintbrush – you can opt to vacuum the dirt in case the paint is still wet
- Connect the heat gun to the power supply and switch on
- Gently, heat the painted brick – pass the heat gun nozzle over the paint surface at an approximate distance
- Repeat the process until the paint begin to peel or melt
- Using a paint scraper, scrape off the paint
- Reheat the paint once more and scrub until the entire paint layer is removed
- Then, wash the brick with water and soap to attain a quality finish
- Rinse the brick’s surface with water and leave to dry
See Also: Walk-Behind Concrete Grinder
Method 4: Use of Ammonia Solution
Ammonia solution breaks both dried and wet (latex and acrylic paint) paint instantly upon application and won’t react with primary concrete material if the right concentration is used.
However, ammonia emits fumes that may irritate your nasal cavity if inhaled.
Materials and Tools Required
- Ammonia solution – buy from amazon
- Warm water and an empty bucket
- Steel brush and rag
- A paintbrush and respirator
- Gloves and overall
- Boots and goggles
- Detergent
Procedure
- Wear protective gear and clean the bricks
- Dilute ammonia solution with warm water
- Test the solvent over painted brick – to assess the paint removal process
- Apply ammonia solution (using a paintbrush) until the entire surface is covered
- Leave it for 15 minutes to cure
- Using a scraper or a steel brush, scrub the surface gently- to remove quenched paint
- Wipe off the paint with a paintbrush
- Repeat the steps above until the paint completely removed
- Wash the surface with water and soap detergent
- Mop the surface and rinse it with clean water
- Leave it to dry to touch
See Also: Penetrating Concrete Sealer
Precautions to Consider When Removing Paint from Bricks
During the paint removal process, you are required to stick to safety measures and precautions highlighted below:
- Always wear protective attires (respirator, gloves, goggles, overalls, and boots) when removing paint from bricks for personal safety
- Never smell paint stripping chemicals or thinner directly – the solvents contain components, which may irritate or choke you if inhaled
- If you are new to paint removal, contract a professional painter to assist you
- Always follow the manufacturer’s instructions when preparing your paint removing the solvent
- In case you get into contact with thinner or stripping chemical, wash the section with plenty of soap and water
- Before application, always carry out a drop test experiment to assess the paint action over the painted brick
- Clean the brick before applying paint stripping solvent – to improve removal action
- For power washer, sandblaster, and paint grinder, you must check the power rating for compatibility before plugging into the power supply
- Keep off stripping chemical from the fireplace – most oil-based stripping chemicals are flammable
- Before use, always check the expiry date of any paint stripper or thinner
Wear protective gear for your own safety purposes and adhering to precautions given in order to avert problems or disasters that may occur during the paint removal process.
In case you are new to the paint removal process, contract a professional paint remover to assist.
Conclusion
In summary, on how to remove paint from brick, you can either use Trisodium phosphate (TSP), paint stripper/thinner, soda blasting method, paint scraper, and turpentine, or use a power washer.
Further, you can opt to use an absorbent paint stripper, paint grinder or sandblaster, pressure washer, or even consider a commercial paint stripping chemical.
Every paint removal method has a particular procedure (as highlighted in this article) and hence, you must stick to details and instructions given or otherwise advised by the manufacturer.