How to Seal Painted Wood for Outdoor Use
Sealing wood for outdoor use is critical since most sealants contain active agents and UV-rays blockers that protect the wood from fading and aging. Perhaps you intend to seal your outdoor painted wood or structure and wonder how to go about it? 
Well, in this article, we are going to discuss how to seal painted wood for outdoor use. Initially, you need to select appropriate tools, purchase the right wood sealant, prep the surface, prepare the sealant, and carry out the actual application gently with a paintbrush or a roller.
Besides, you’ll need to prepare the surface for the second seal and eventually apply the final coat before leaving the seal to dry naturally. Remember, the sealed wood surface should be covered with a polyethylene bag to eliminate dust stains or debris.
Details: How to Seal Painted Wood for Outdoor Use
Step 1: Choose the Appropriate Tools
- A Paintbrush or a Roller
- An empty bucket and a putty knife
- A broom or a vacuum cleaner
- A blower and tack cloth or mop
- Polyethylene bag and Sandpaper
- Protective gear – overall, boots, gloves, facemask, goggles, etc.
- Sealant and thinner
Step 2: Select the Right Sealant
Selecting the best sealant for painted outdoor use is critical in achieving a long service life. However, we shall classify sealant into three categories:
Currently, there are a couple of sealants in the current market that may even be confusing if not well matched to the wood type under the sealing process.
See Also: Stain for Pressure Treated Wood
1. Polycrylic sealants
Polycrylic sealants integrate low VOC components (less pollution) and contain polyurethane resin, which is embedded in its chemical structure. The solvent has white color pigments that turn colorless/clear upon drying.
Polycrylic sealants work best over latex paint (forms a strong bond), but easily washed out with water or water-based thinner.
Polycrylic sealants don’t stick or bond sufficiently when applying over oil-based paint – the sealant peels or chips after sometimes.
Unlike polyurethane sealants, Polycrylic sealants are less durable and have a considerably lower service life.
However, Polycrylic sealants are highly preferred due to their low VOC components – they are fewer pollutants.
2. Polyurethane Sealants
Polyurethane Sealants are manufactured as either water-based or solvent-based polyurethane compounds for the easier application process.
Usually, Polyurethane Sealants form a tough finish coat, which resists peeling, chipping, or fading with time.
Moreover, Polyurethane Sealant delivers a scratch-resistant coat layer that is less susceptible to UV-rays damage.
Though Polyurethane Sealants contains some toxic fumes/components, the solvents guarantee long service life and overcome challenges such as peeling, chipping, scuffing, or flaking, especially during winter or humid environment.
The solvent-based Polyurethane Sealants are the best suitable oil-based painted wood – avoid using it over latex pain and vice versa. See Also: Paint Sprayer for Doors.
3. Sealant and Paint Combination
This combination entails a gallon paint container that integrates sealing compounds within its chemical formulation. Such kind of paint is there (but rare).
Usually, the sealant sticks along the paint layer and acts as a UV-rays blocker upon drying. This solvent compound is also resistant to fading and peeling especially if the right number of coats are applied.
Before buying sealant and paint combination compound, it’s advisable to confirm the labels for certification purposes.
Remember, sealant and paint combination is a better option for a low-cost alternative. However, this method may not be stronger than using the actual sealant approach.
Step 3: Surface Preparation
- Wear protective gear (gloves, facemask, respirator, boots, and overall) for safety purposes.
- Using a sweep, clean the painted wood surface to remove dust and debris from the surface. You can opt to use a vacuum cleaner in order to attain better results.
- Using a mop or wet rag, rinse the wood surface, and leave it to dry.
NB: You can opt for the sand section that has rots or mold using fine-grit sandpaper.
Step 4: Sealant Preparation
- Pour the sealant into an empty bucket – start with a smaller quantity.
- Thin accordingly and stir thoroughly to attain a uniform solution. When thinning, follow the manufacturer’s instructions keenly.
- Blend the sealant with surface color, if necessary, and stir once more.
NB: A well-prepared sealant should hold on to the paintbrush without many drains. See Also: Paint Sprayer for Fence Stain.
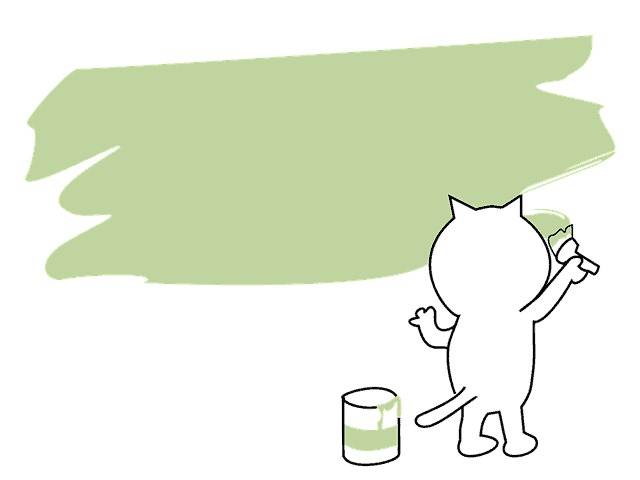
Step 5: Sealant Application
Before you begin the sealant application, it’s advisable to carry out a drop test experiment over the painted wood to ascertain the stickiness action.
- Dip the paintbrush or a roller in the sealant solvent and load the solution sufficiently – cut off all drains.
- Apply the sealant over the painted wood gently – back and forth. For vertical wood surfaces, you need to load the paintbrush just slightly to avoid runs.
- Cut the corners using an angled paintbrush before painting the flat areas. Flat surfaces are best applies using a paint roller – it reduces time and eliminates runs.
- Cover the entire painted wood with sealant and smoothly correct the drains/runs before they dry
NB: Avoid overload a paintbrush or a roller – overloading leads to the formation of runs/drains during sealant application. Besides, do not over press the roller when sealing to prevent streak formation on the surface.
See Also: Deck Stain for Weathered Wood
Step 6: Finish Preparation
- Upon drying, blow air over the sealed surface to remove dust and strengthen the sealed layer.
- Alternatively, you can polish (using the soft-grip polishing machine) the surface to attain a better contact point for second coat application.
Avoid sanding the newly sealed layer.
Step 7: Final coat seal
- Dip the roller into the sealant and load it sufficiently.
- Apply over the painted wood surface (second coat) gently – back and forth
- Repeat the above procedure until the whole surface is completely sealed.
- Leave the seal coat to dry naturally.
Do not touch the sealed surface with your hand (you leave fingerprints on the surface).
Cover the sealed wood with a polyethylene bag to prevent it from dust or debris staining.
What are the Major Problems of Unsealed Painted Wood for Outdoor Use?
Painting wood for outdoor use may not be enough as the paint layer may not be strong enough to overcome harsh weather conditions such as UV-ray damage. Unsealed pained wood may be subjected to problems such as:
1. Peeling and Flaking
Peeling is a condition that occurs due to insufficient adhesive force between the sealing layer and paint coat. Often, peeling is caused by humidity, excess heat, and poor paint preparation.
The paint layer tends to lose surface contact and detaches itself leading to peeling action.
Sealant covers the paint layer and blocks extreme weather conditions such as heat, moisture, and UV-rays that may initiate peeling or flaking.
2. Chipping
Chipping occurs due to high humidity or moisture content beneath the paint layer leading to intermittent paint particle removal.
Usually, chipping is more pronounced on wooden structures found in wet areas than in dry ones.
The seal layer prevents moisture penetration and keeps off water content from the wood surface upon application, thus preventing chipping action.
3. Aging
Paint age due to direct exposure to external harsh conditions such as heat, direct sun radiation, UV-rays exposure, or excess surface moisture.
The paint chemical formulation is broken down by forming a weak molecular network, which ends up peeling, scuffing, or chipping with time.
Moreover, aged paint is highly susceptible to scratch or abrasion strains.
Sealing paint reduces aging factors and kills the intensive external exposure that destroys the paint’s chemical structure.
Importantly, sealant impairs the growth of mold and mildew, which accelerate the aging process.
See Also: Paint Stripper for Wood
4. Fading and Defacing
Fading is the loss of paint original color due to prolonged external exposure to particular external conditions. The color pigments lose their initial attractiveness leading to a natural aesthetic impression.
Paint sealant contains active ingredients, which protect the painted wood surface from harsh weather conditions such as excess heat, high humidity, and UV-rays effects.
Moreover, the integrated active blockers in the sealants protect the paint color form from defacing easily.
How to Maintain Sealed Painted Wood for Outdoor Use?
Sealed wood for external use guarantees you a longer service life without repair, paint restoration, or an entire replacement.
It’s advisable to follow the highlighted maintenance tips to boost wood durability and eliminated repainting cost:
- Always match wood structure with the right paint sealant.
- Wooden structures used in wet outdoors should be coated with polyurethane sealants instead of Polycrylic sealants
- Avoid applying too many layers of paint sealant as it may initiate strain peeling with time.
- Mop/clean surface dust often for sealed wood found in the dusty outdoor environment – dust weakens the seal/paint coat if not attended.
- Any peel/chip occurrence on the sealed wood should be fixed immediately to avoid further wood damage.
- Avoid scratching dirt or surface stains found on sealed wood structures – instead, consider solvent removal alternatives.
- When sealed wood flakes over a large section, it’s necessary to restore the entire wood surface to improve wood service life.
- Always restore sealed wooden with previously used sealant – match the sealant with the type of primary paint applied – oil-based paint should be sealed using oil-based sealant and vice versa.
See Also: Removing Paint from Wood Trim
Safety Measures and Precautions to Consider when Sealing Wood
Safety is paramount when sealing out wood for outdoor use. Follow precaution highlighted below during the sealing process:
- Purchase sealant that matched the wood type and the prevailing weather condition of the area.
- Always perform a drop test experiment over the painted wood to ascertain the seal performance.
- Remember to wear protective gear (goggles, overalls, gloves, boots, respirator, and facemask) when carrying out the sealing process.
- Never smell wood sealant directly as it contains some compounds that may cause nasal irritation or respiratory problem when inhaled.
- Before applying wood sealant, make sure the surface is sufficiently prepared and dust-free to improve stickiness action.
- All surface debris and waste material should be swept and disposed of in a dustbin or a garbage pit.
- Never use expired sealant on painted wood – always check the expiry date and return or dispose of expired sealant appropriately.
- Low VOC sealant should be preferred for environmental purposes.
- Always follow the manufacturer’s instructions when preparing sealant for use on painted wood structures.
- In case you get into contact with wood sealant, wash the section with plenty of water and soap.
- The sealant that remains should be store away from pets and children.
See Also: HVLP Spray Gun for Woodworking
Conclusion
Having read this article on how to seal painted wood for outdoor use, I believe that you gained skills that will improve your wood painting activity and carry oy DIY projects without any problem.
Often, most outdoor painted wood are susceptible to fading, peeling, and aging especially when the wrong paint and procedure is undertaken.
To seal painted wood for outdoor use, you need to select appropriate tools, purchase the right wood sealant, prepare the surface, prepare the sealant, and carry out actual application gently with a paintbrush or a roller.