How To Use An HVLP Paint Sprayer
HVLP sprayer manual may not always give you detailed technical information needed when spray painting. Therefore, you need further insight to attain an excellent paint finish when using an HVLP paint sprayer. 
On how to use an HVLP paint sprayer, start by selecting items required, choose the right tip for the painting task, assemble the sprayer, fix the hosepipe and power cable, fasten the canister and other gun connections, and plug in the sprayer to a power source before pressing on the switch button.
Moreover, set the paint sprayer’s air pressure and volume accordingly, fill the canister with well-thinned paint, adjust the sprayer for testing and test the paint coat over the section board, tune the sprayer to full coverage, and start spraying over the surface evenly.
Details: How To Use An HVLP Paint Sprayer
Once you are done with spraying, release the trigger (to stop spray action), switch off and unplug the sprayer for power source, reset the pressure settings, and clean the HVLP sprayer before storing it in a cool dry place.
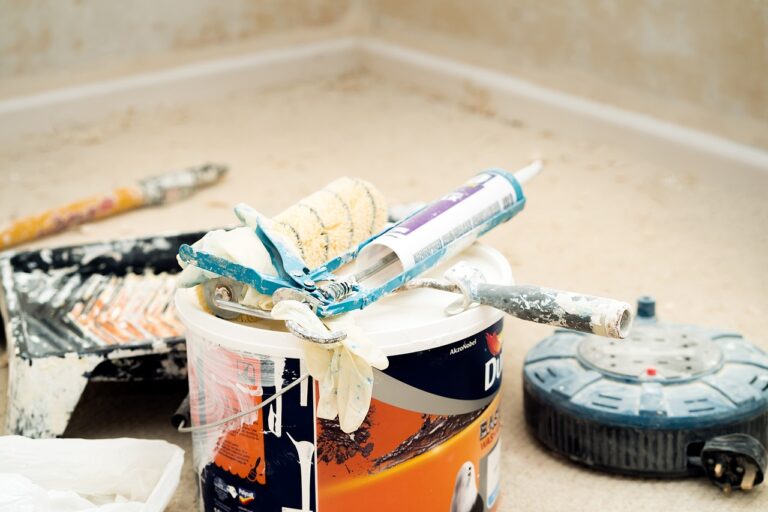
Always put on protective gear when using an HVLP sprayer for your own personal safety. The items required include:
- HVLP Paint Sprayer and Extension cable
- Power source and an empty bucket
- Waterpoint and Thinned paint
- HVLP spray tips and paint test board
- Protective gear – overall, gloves, respirator, etc.
See Also: HVLP Paint Sprayer for Latex Paint
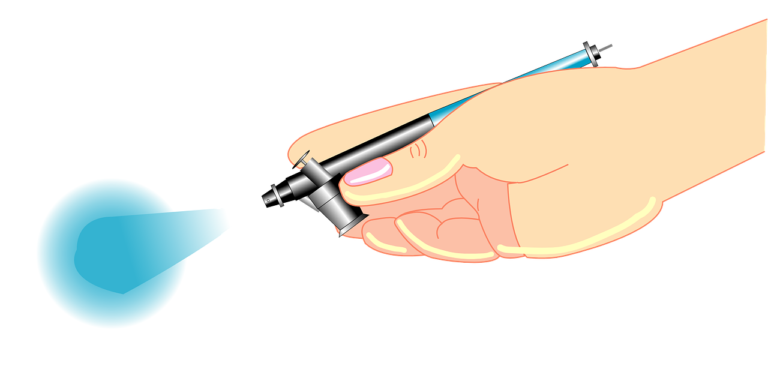
Step 1: Select and fix the Right Tip for the Current painting Job
The HVLP sprayer comes with various spray gun tips to match the prevailing surface painting demands.
Therefore, you will need to assess the nature of the surface under paint application before selecting the type of HVLP gun tip to use.
Moreover, the size of the tip orifice is a function of the thickness of paint being used – thick paint needs a wider orifice tip, while thin paint needs a narrow orifice tip.
For the rule of the thumb, the HVLP gun tip for commercial use is either 1.0, 1.3, 1.4, 1.7, 2.0., or 2.5 – these tips work best with low-top high viscous paint without blockage.
Besides, these tips work excellently with vinyl, epoxy, sealers, and stains without clogging.
Step 2: Assemble the HVLP Paint Sprayer
Assemble the HVLP paint sprayer by following the manufacturer’s manual.
In this, you need to mount the suction pipe in pace, fasten the spray gun, fix the trigger, fasten the gauge, connect the compressor, and clean the flush release point.
During the assembly, be careful not to use excess fitting force – you may break parts and latches or lock mechanism.
Step 3: Fix the Right Hosepipe and Power Cable length
According to the surface area under paint application, you may need to extend the suction hosepipe (to offer wide-area coverage) and the power cable to prevent frequent removal or disconnection.
Further, the extension hosepipe should be the same size as the feed pipe to prevent internal shocks when painting due to pressure differences.
Avoid using low-grade extension power cable – they cause internal cut-off in case of a power surge.
See Also: HVLP Spray Gun for Lacquer
Step 4: Fasten the HVLP canister in Place and Other Gun Connections
Fasten the HVLP canister appropriately – you can screw or slide to lock depending on the nature of the lock mechanism.
Moreover, fit other gun connections properly and alight the spray gun channel to pick paint flow effectively and improve the atomization process.
Step 5: Plugin the HVLP Paint Sprayer to Power Supply
Connect the extension cable with the sprayer’s power plug pin (consider a qualified electrician during the connection) and plug it into a power source.
Switch on the power button at the source. NB: The power cable should be placed alongside to prevent crisscross danger when painting.
Step 6: Set the Paint sprayer’s Air pressure and Volume Accordingly
Switch on the sprayer and set up the air pressure & spray volume as per the manufacturer’s directives.
Usually, set the start pressure at 50 PSI for easier pickup. HVLP pressure varies when spraying at a maximum within 40 to 60 PSI as per the manufacturer’s rating.
Using the regulator, turn on turn the pressure up to favorable spray speed.
Then, release the air volume control knob and listen to the hissing sound until you hit the volume balance. Importantly, mark the painting setting dial for subsequent operation.
See Also: Thinning Latex Paint for HVLP
Step 7: Fill the Canister with Well-thinned paint
Gently, fill the paint canister or paint pick-up can with well-thinned paint.
Close the canister to prevent paint spilling when carrying out actual paint application.
Alternatively, set the paint pick-up bucked strategically and fill it with thinned paint – this is for the pump suction option HVLP sprayer.
Step 8: Adjust the HVLP for Spray Testing and test the Sprayer
Adjust the HVLP sprayer at the dial and aim the spray gun to the test board.
Pull the trigger and spray evenly over the surface. Assess the paint coat attain.
Also, check the fan width in relation to the surface area under paint application.
Step 9: Tune the HVLP Gun to Full Coverage and Start Spraying
Upon approval of the test paint coat, turn the sprayer to full coverage and carry on with continuous surface spray action.
During paint application, try to maintain a continuous even distance over the surface (between spray gun and surface) and avoid excessive trigger action as it leads to overspray or uneven paint coating.
Besides, instant trigger disconnection between points is highly recommended to prevent surface drains or runs.
See Also: HVLP Spray Gun for Cabinets
Step 10: Release the Trigger and end Spraying
Once you finish painting, release the gun trigger at the endpoint spray technique.
Alternatively, you run the test board over the paint surface during paint application for instant cut off before you release the trigger.
Wrong trigger termination initiates drains and forms an uneven surface coat layer.
Step 11: Power off and Reset the Pressure
Switch off the sprayer (at the gun provision) and reset the pressure dial – just turn the control know to the lowest point.
For a digital set up, key the setting to zero standards. Proceed and power off the entire connection at the main power source. Then, unplug the cable and disconnect the power cord from the sprayer.
Step 12: Clean the HVLP Paint Sprayer and Store
Clean the HVLP paint sprayer as per the instruction given in this article.
When cleaning, be careful not to damage the gun tip and set up kits. Disassemble the parts and clean them independently where possible.
Finally, store your HVLP paint sprayer in a cool dry place. Do not store a sprayer that is not dry to touch.
See Also: Paint for Guns ed
How to Clean HVLP Paint Sprayer
Upon painting, it’s advisable to clean your HVLP paint sprayer in order to improve its service life and boost the spray performance. To do this, follow the steps highlighted below:
- Release the pressure and flush remained paint into an empty bucket.
- Connect the suction pump to clean water and run the paint sprayer to self-clean the channel. Alternatively, use paint thinner during the self-clean cycle if you were painting with oil-based paint.
- Disconnect the spray gun, the canister, and the hosepipe. Clean each part independently, and rinse them with clean water.
- Assemble the sprayer parts and run the final self-cleaning process using clean water.
- Wash external parts with soap and water. Rinse the parts to dry.
Leave the spray gun to dry entirely before storing it in a cool dry place.
See Also: Gravity Feed Spray Guns
How to Mix Paint for HVLP Paint sprayer
Whether latex or oil-based paint, proper thinning is crucial for excellent handling by the HVLP paint sprayer.
Wrongly thinned paint affects sprayer performance and reduces the overall service life. To mix paint, follow the procedure given and material required below:
- Respirator and Safety goggles
- Paint stirrer and a Paint strainer
- Empty Bucket and HVLP Spray gun
- Test Boards and Overall
- Boots and water or mineral spirits
- Paint and Thinner
Steps and Mixing techniques
- Wear protective gear – gloves, respirator, overall, boots, and goggles.
- Pour the paint into an empty bucket gently
- Add thinner into the paint little by little.
- Using the paint stirrer, stir the mixture to attain a uniform solution
- Add more thinner (water for water-based paint or turpentine for oil-based paint) and stir further to attain lighter paint
- Carry out the drop text experiment over the test board. Usually, you drop thinned paint on the surface, tilt gently, and assess the flow. Well-thinned paint should flow smoothly and slowly
- Alternatively, you can use a paintbrush to check loading capacity. Best thinned paint for HVLP sprayer should load on soft blister paintbrush with minimal drains or run
Upon thinning, you can test little paint with an HVLP paint sprayer before actual spraying action is undertaken.
Highly viscous paint should not be tested with HVLP as it damages the gun tip or causes internal blockage/clogging.
See Also: Sprayer for Latex Paint
Precautions to Consider When Using HVLP Paint Sprayer
Precautions and safety measures highlighted below should be adhered to when using an HVLP paint sprayer:
- Always put on protective gear when using a paint sprayer for your own safety purposes.
- Before setting up the sprayer, read the manufacturer’s manual thoroughly and stick to the instructions given.
- Match thinned paint to a particular gun tip selected to prevent damage and blockage.
- Clean paint sprayer after using and store it in a cool dry place.
- Never set up or repair the HVLP sprayer if you are not sure of it. Always contact a specialist if you are new to the HVLP paint sprayer.
- Don’t over press the paint trigger – you may damage the operating mechanism or cause an overspray.
- Before actual spraying is undertaken, carry out a spray test experiment over a test board to assess the sprayer’s finish quality.
- All sprayer settings should be done before power is engaged for safety purposes – the main power supply should be turned on.
- When cleaning a paint sprayer, individual parts should be cleaned carefully to prevent damage.
Once you are done with painting, release the trigger (to stop spray action), switch off and unplug the sprayer for power source, reset the pressure settings, and clean the HVLP sprayer before storing it in a cool dry place.
Remember, personal safety is paramount. Therefore, you should always put on protective gear when using an HVLP sprayer.
See Also: Cleaning a Paint Sprayer
Conclusion
To wrap, on how to use an HVLP paint sprayer, you start by selecting items required, choose the right tip for the painting task, assemble the sprayer, fix the hose pipe and power cable, fasten the canister and other gun connections, and plug in the sprayer to a power source before pressing on the switch button.
Further, set the paint sprayer’s air pressure and volume accordingly, fill the canister with well-thinned paint, adjust the sprayer for testing and test the paint coat over the section board, tune the sprayer to full coverage, and start spraying over the surface evenly.