How to Use TSP Before Painting
TSP (Na3PO4 – Trisodium Phosphate) is a detergent (an all-purpose cleaner) to clean wood, masonry, drywall, and plaster that also leads to skin burns. You can use it for emergency cleaning, such as in removing soot in preparing for painting.

Due to its ability to dissolve and emulsify, TSP has various uses, including heavy-duty cleaning, driveways preparation, paintbrush cleaning, paint stripping, and degreasing.
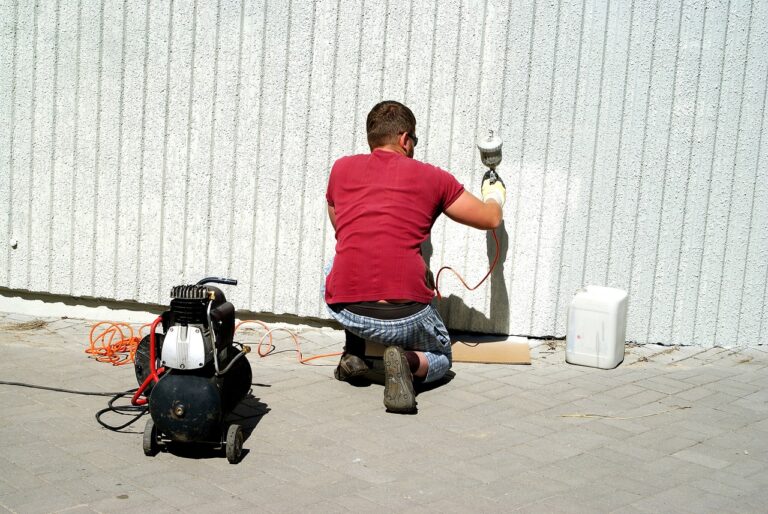
- On how to use tsp before painting, prepare the walls for painting by repairing all cracks, and ensuring sand or smooth the surface walls. Lay down some drop cloths and tape off the surfaces nearby wood trim, baseboards, and ceiling.
- Mix the TSP cleaner with adequate water for the best results on the various surfaces. Also, rinse the TSP from the surfaces and allow enough drying time before painting. Alternatively, you can use sandpaper since TSP can remove paint.
Details: How to Use TSP Before Painting
Step 1: TSP cleaner Prepping
You’ll mix the TSP powder with some warm water (in a larger bucket) and use it to wipe down the surfaces – this enhances the paint’s adhesiveness – which also TSP acts as a stain remover, removes mildew and molds.
So, dilute your TSP using warm water in the ratio of 1/2 cup of the TSP with warm water (2 gallons). Once you get the cleaning mixture, take another container with some clean water. Ensure to stir with a paint stirrer to dissolve TSP.
For safety purposes, wear protective goggles and rubber gloves when working with the TSP cleaner. You’ll require to dip some sponge into your TSP cleaner to wipe down your walls.
See Also: Belt Sander for Deck
Step 2: Workstation or Area Prepping
It is time to prepare the workstation or work area that’ll provide the location to wash the items to be cleaned (fast enough), such as the cabinet doors. The items will require some drying after cleaning, and thus, more things must be cleaned at once.
So, gather all the cleaning materials before beginning the area preparation work. For example, recommend your cabinet doors from their boxes. Place the doors on the surfaces that’ll be safe to use with TSP.
With TSP, you can easily clean your furniture, such as cabinets and decks, in preparation for painting – considering the type of paint you’re using. TSP (NA3PO4) will also effectively remove soot build-up from walls.
Step 3: Cleaning with TSP
Remember to wear rubber gloves before you begin the cleaning task – this prevents skin irritation, particularly on any opening or small cuts on the hands. You may use a towel, rag, or even a sponge for cleaning.
Remember to concentrate around the handles and corners and clean along the wood grain to remove dirt and grease that’s build-up easily. Ensure the area is effectively ventilated before starting the cleaning – sander for wood trim.
Ensure to remove all or any grease that has built-up on the surfaces since residue may prevent effective paint adhering and thus reduce the quality of the final product.
Step 3: Rinse the Surfaces
Get some rag or cloth dipped in clean water and rinse the TSP cleaner and other residues from the clean surfaces such as cabinet doors. The clean water also rinses the excess grime or grease removed by TSP.
Further, raise the cabinet doors as well as walls – before saving the surfaces and finally painting. You can also remove the tile backsplash for a better surface outlook, as seen in this guide.
Also, keenly rinse off the workspace and don’t leave any TSP on the surfaces as it may harm other people. You may dump the excess TSP in the lawn, grass, or dirty – but ensure it won’t drain into the streams, lakes, or sewer system.
But for smaller quantities of the TSP solution that’s left after the cleaning process, you may flash it down into the washtub drain, sink, or toilet. However, ensure to check the laws on disposal of hazardous waste.
Step 4: Surface Painting
Painting the item surfaces, including your cabinet doors, will take some time – but will equally freshen up the cabinet and door. Yet, you may avoid surface prepping if you’re painting on a primed wall that’s new.
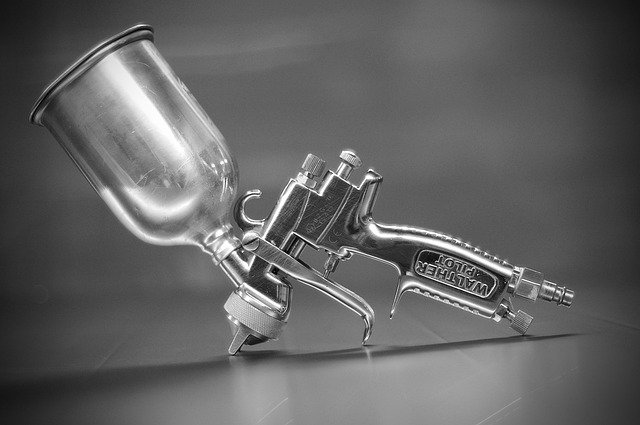
Remove the drapery hardware plus the draperies. Further, loosen your light fixtures and probably wrap them using plastic bags. For the switches and electrical outlets, get out their wall plates – use a good sprayer gun.
But for painting cleaning the surfaces, choose to work on chipped, peeling, and rough areas – you can remove the room furniture to see all the flaws – which you may cover using drop cloths.
See Also: Paint for Concrete Walls in Basement
TSP Surface Cleaner – Pros
Once you fix the flaws and wash the surfaces using TSP, wall-cleaning soap, or household detergent to remove airborne dirt, cigarette smoke, grease, and soot, you may use some for woodwork deglossing solutions plus some light sanding.
- Efficacy: TSP has an excellent working mechanism on the cleaning surface, making them ready for painting. This is because the cleaner will remove the most stubborn dirt, grease, and stains.
- Mildew and Mold treatment – TSP will effectively wash done the stubborn debris on the surfaces, including mildew and mold – thanks to including ingredients such as household bleach.
- Paint-removing ability – The TSP solution will also help peel off the old paint on the exteriors from the surfaces as you prepare to paint. The solution will remove flaking and splintered leftover paint.
- Beautifying the exterior surfaces – On cleaning the surfaces, TSP will leave your surface clean and undamaged – including on surfaces such as roofing, wood, cement, stone, and brick.
- Simple application – Despite having a strong cleaning capability, TSP is also equally simple to apply as you can use some sprayer, sponge, or brush.
The pros of using TSP in the cleaning space makes them suitable for clearing concrete paint stains or even refinish your deck.
TSP Surface Cleaner – Cons
As noted above, the handles and corners will have accumulated most of the grease and soot, and hence you must concentrate the TSP application around these areas. Here are the cons of using the TSP cleaner;
- Damage to some surfaces – Sadly, TSP can damage some surfaces, including glass, grout, ceramic tile, and metal, including areas in the bathroom.
- Limitation from Local regulations – Some local authorities may have limitations for the use of TSP. This is particularly so on the disposal of any excess or remaining the TSP solution – must not get to the streams or lakes.
Landscaping danger – For outdoor, using the TSP solution – mainly when mixed with bleach – may damage the landscaping. Thus, you must apply during a windless day and ensure to hose down the tree branches, shrubs, and plants.
See Also: Stain for Swing Set
Should I use TSP or Deglosser?
TSP has its purpose while the deglossing has the product’s purposes. But TSP has both strong cleaning ability and abrasiveness, and hence it’ll also remove the gloss from different surfaces, including decorative laminates and painted surfaces.
Therefore, you can use TSP like a deglosser – this is when push ultimately comes to shove. You can use borax to clean (just like with baking soda) in addition to killing mildews and fungus on different surfaces.
Acetone is also an excellent TSP substitu5re for cleaning – you can put the liquid in some spray bottle and get it to your surfaces, including the wooden doors or cabinets.
Another non-hazardous material to clean the surfaces is vinegar for paint removal – it is a powerful and natural cleaner. It’ll love not only just paint but also stick-on hooks, wallpaper paste, and decals from doors and cabinets.
Conclusion
Using TSP might be dangerous if you don’t utilize protective materials. But TSP can be diluted with warm water to clean surfaces like furniture items and cabinets before painting.